90% Faster Than Rotary Cutters
Showing posts with label class. Show all posts

Friday, August 2, 2024

Handstitching Project: Sew an Easy Felt Doughnut Pincushion

 This is a fun and satisfying project for all skill levels. From beginner to experienced. It is also useful! I usually do this project early in the school year along with a felt needle book and its fun to see them being used all year.

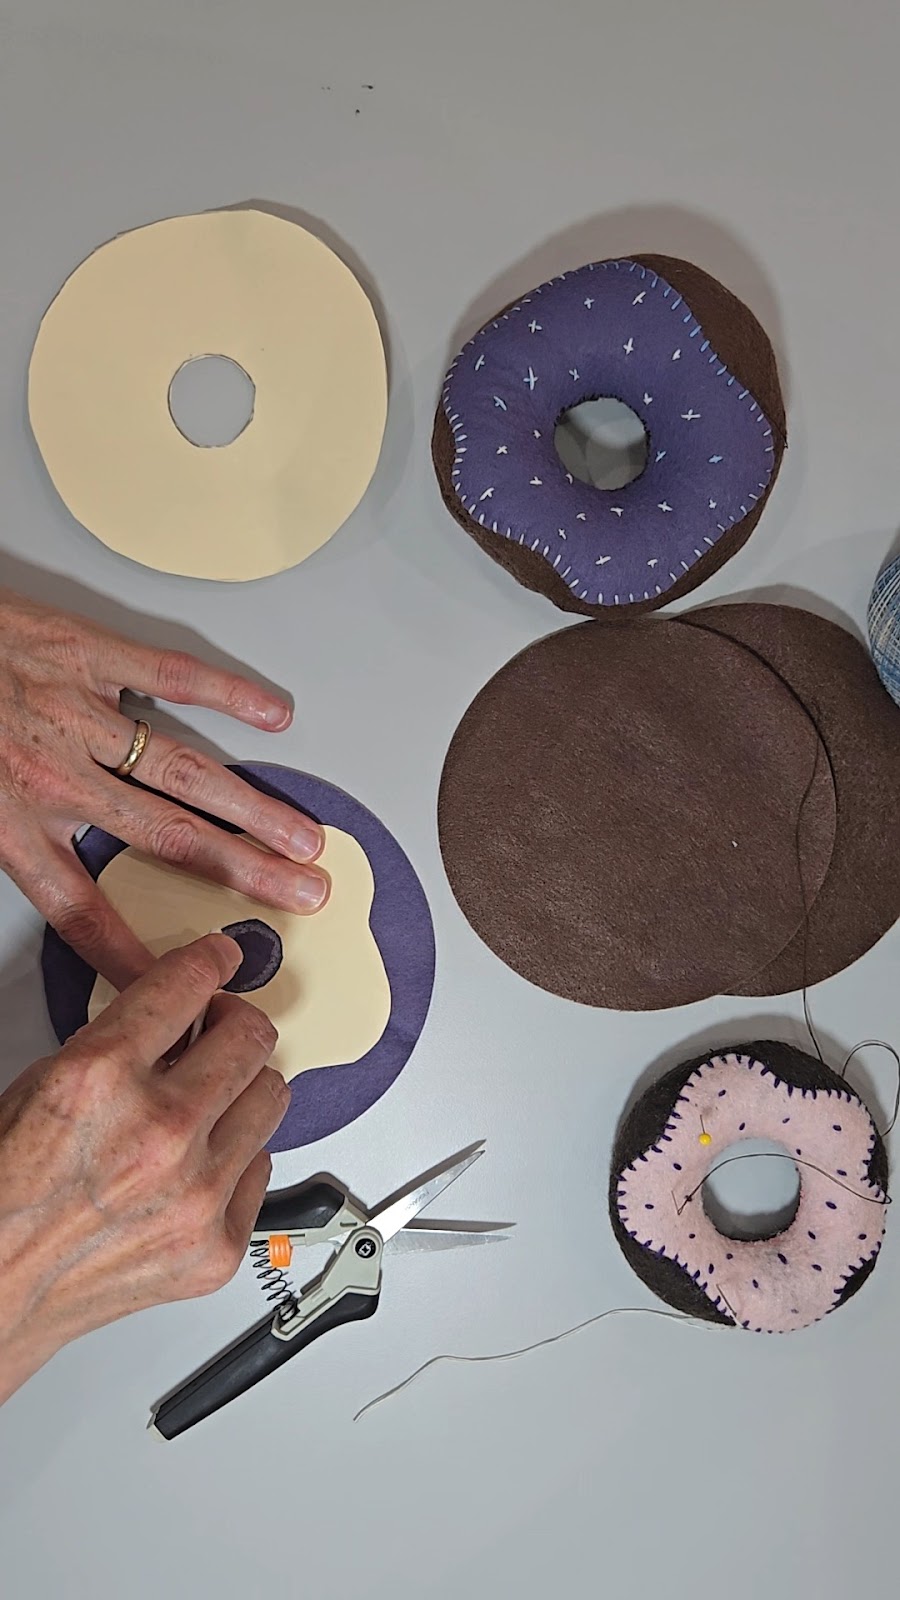
Supplies needed 2) 5 inch felt circles for the doughnuts, 1) 5 inch felt circle for the frosting. Cut 1 inch diameter holes in all three circles. Cut around the edge of the frosting decoratively. I have templates.  It is important for the center holes to be pretty close in size and position.


I made a video. I stitch in real time. Time will tell if this is the best way to do a video. Unfortunately, I had background music playing. There were a couple copyrighted songs. I opted to have those sections muted, I may re do the video in the future. So there are quiet parts. If you have something I need to add clarity to, please ask in the comments here or on youtube.  


First add the center doughnut holes in the doughnut and the frosting.


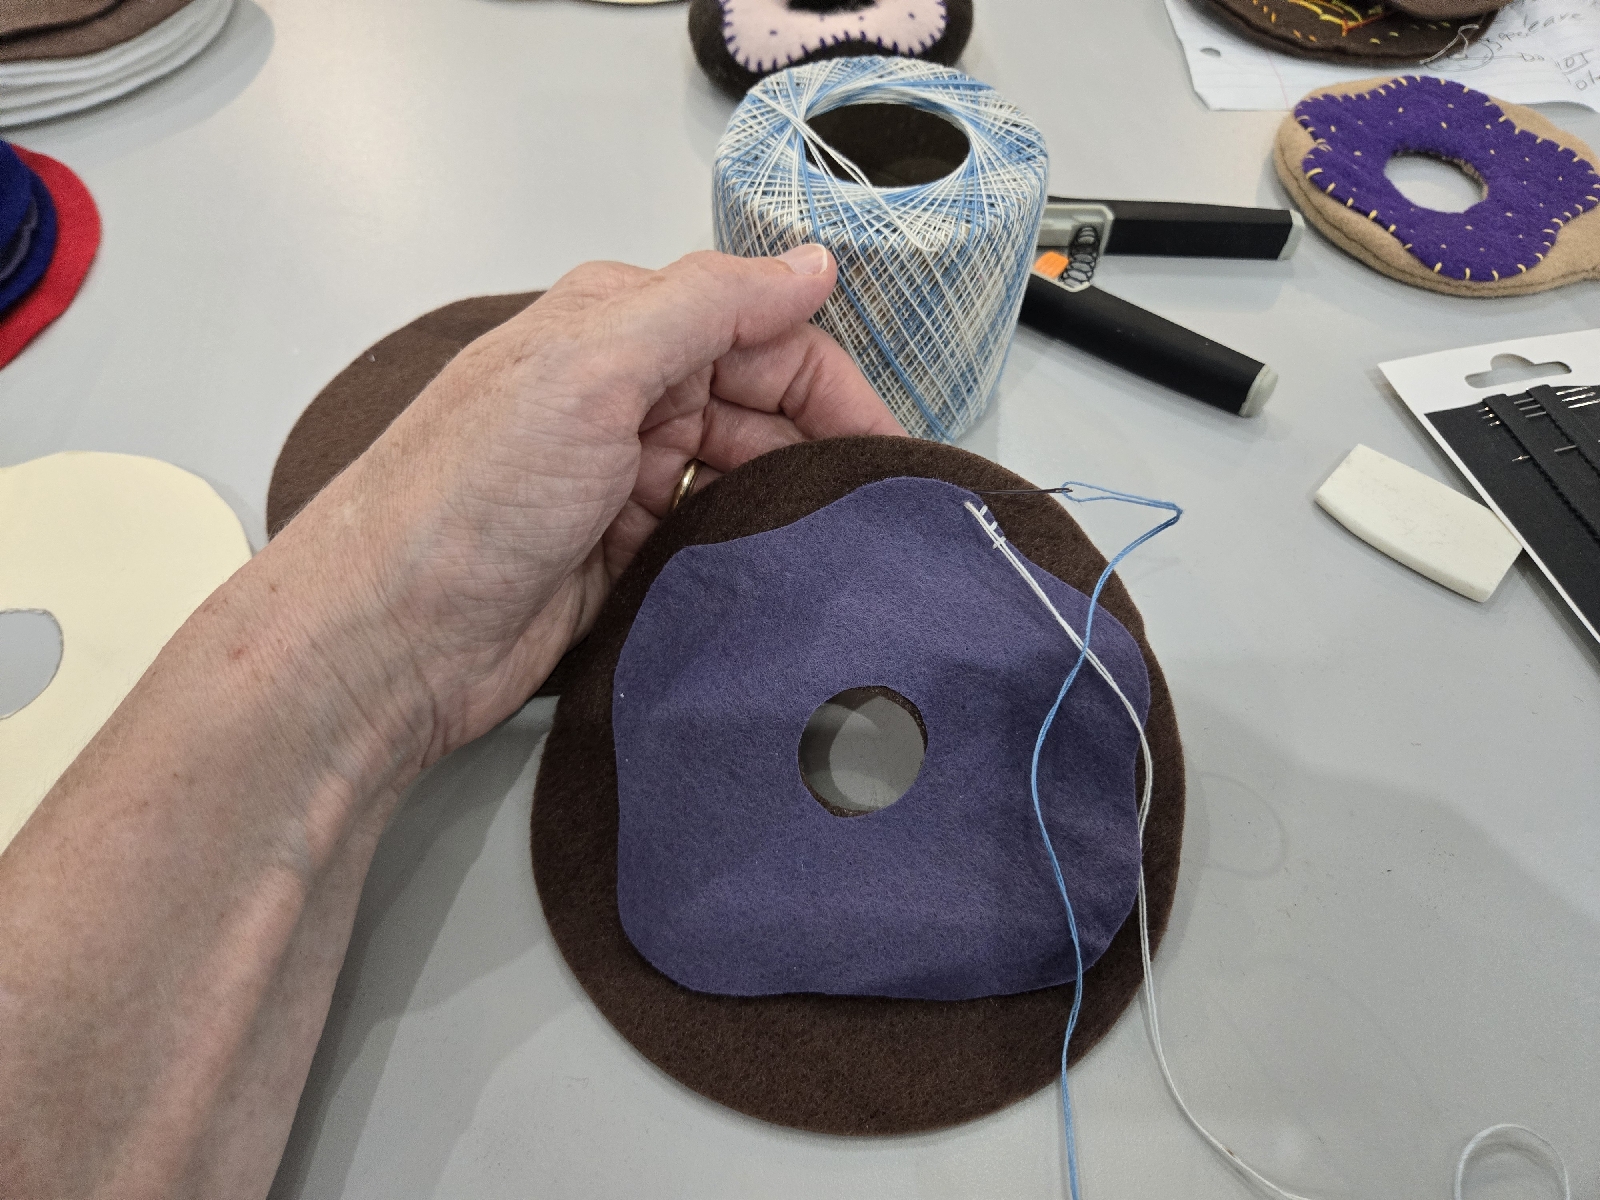
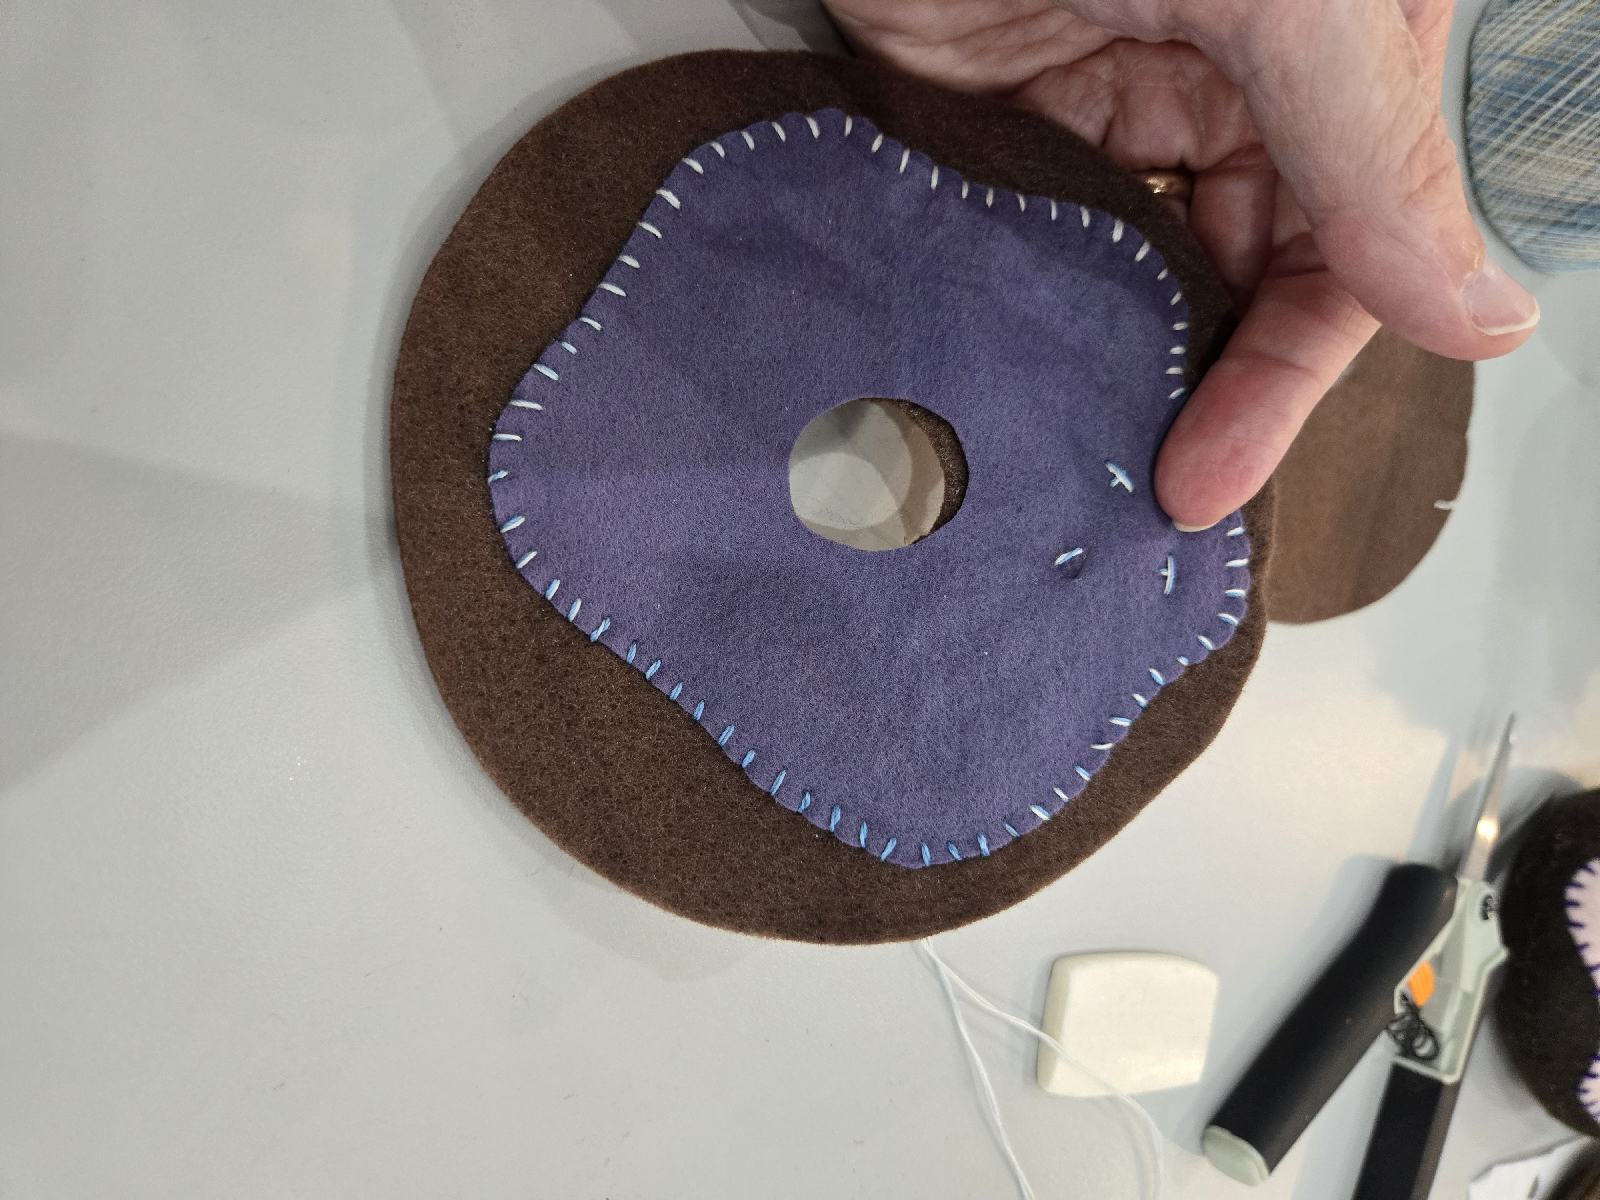
Then stitch the frosting to one of the doughnut pieces. It can be as simple or as elaborate as you desire. I use a heavier thread or embroidery thread. I think I'm using a crochet thread, but I do a lot of second hand shopping and work with donations. So it works! I like to add sprinkles. This time I added an "x" for the sprinkles.


Next, right sides together stitch around the doughnut with regular thread. A running stitch works, but I ended up doing a backstitch.


Leave an opening. Do not stitch the doughnut hole yet!

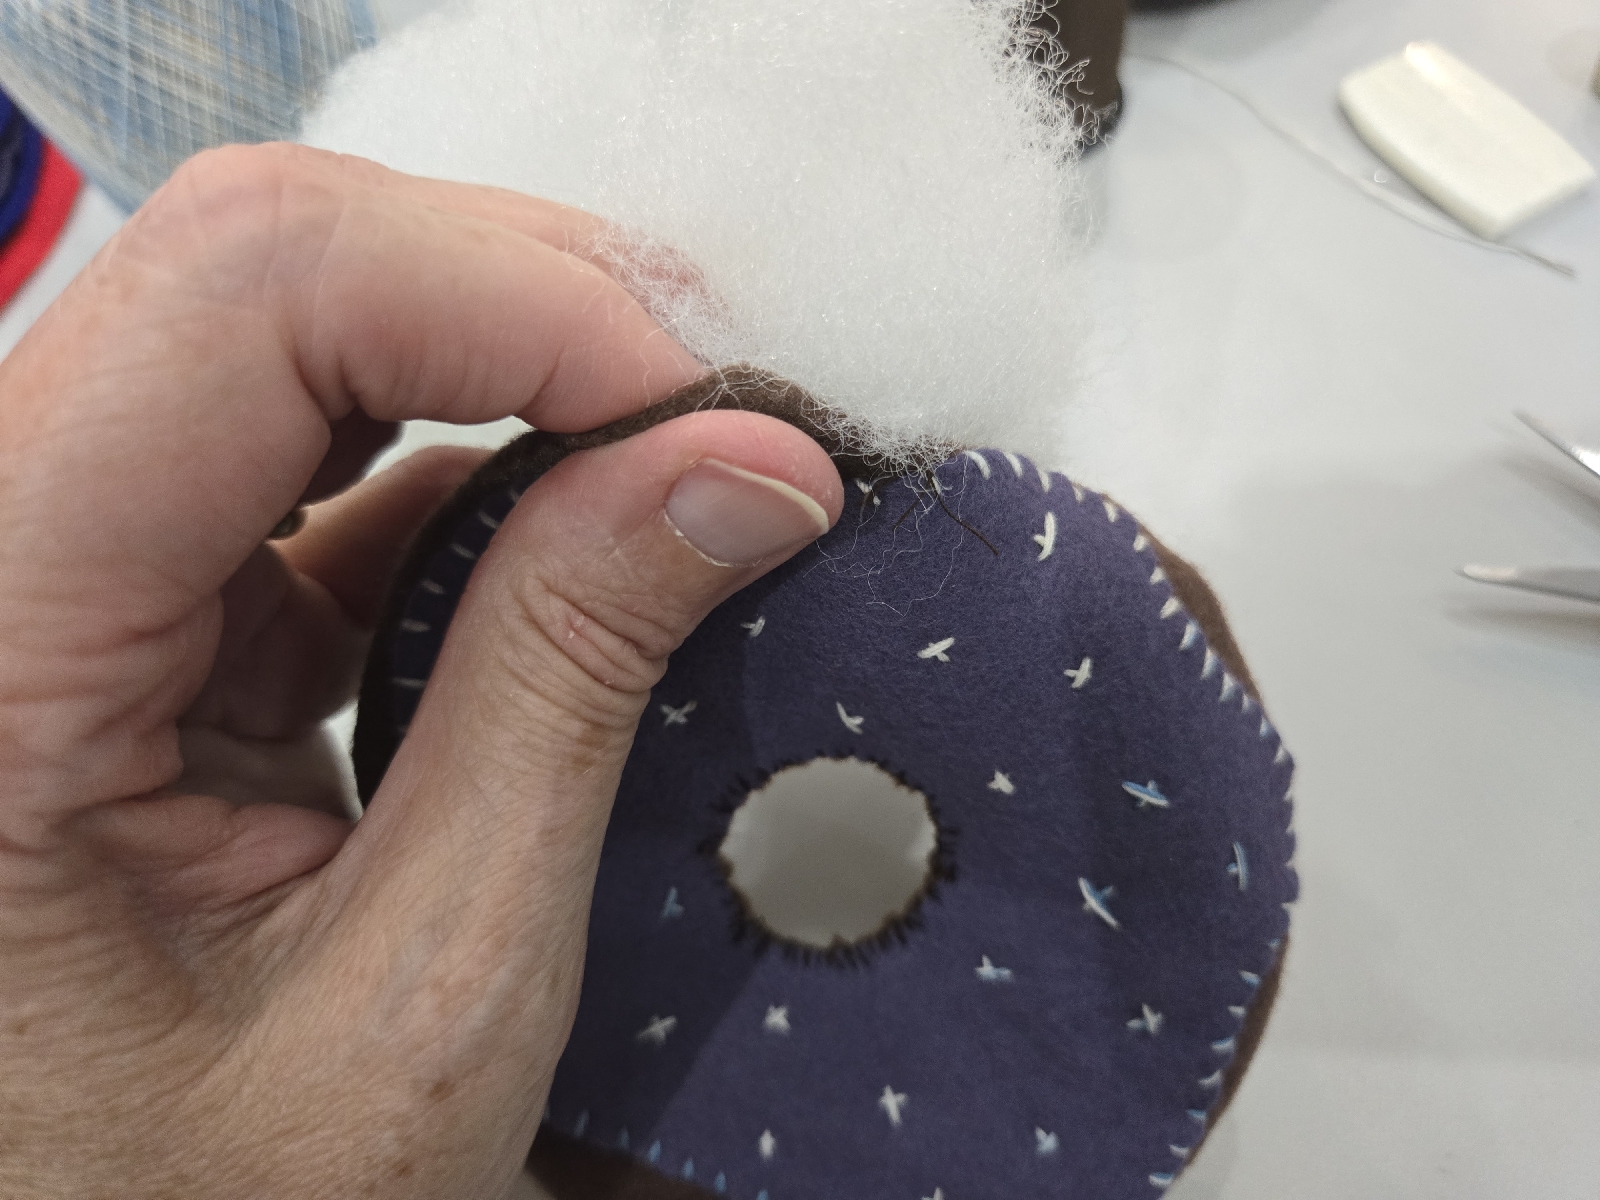
Turn right sides out. Now it is time to sew the middle. I use an overcast stitch. Make sure to catch all the layers and stitch close together so the stuffing will not show.

Stuffing time!


I closed up the opening with a ladder stitch. I didn't get a photo! Please look near the end of the video.

Success!!


Tuesday, July 30, 2024

Craft Haul! Fabric, Felt , and Fleece.

 Its time to start preparing for co op sewing classes. I picked up some fabric from a Facebook fabric swap group, some buy nothing local groups and Facebook Marketplace.


I use fabric cutters from AccuQuilt  it makes class prep go faster and lets the kids have more time for sewing. 

I plan to share some of my go to projects here and on youtube so be sure to follow if you'd like to inspire sewing in the next generation, or if you are just looking for some fun hand sewing projects for yourself!


Wednesday, February 19, 2014

Getting to Know Your Sewing Machine

Lots of people tell me they want to sew, but they don't know how to use their machine. I can relate! It took me forever to learn that it mattered which way the bobbin went in on the machine. But once I figured that out I was off and sewing. I recommend this video class.


FREE Online Sewing Class

Claudia Miller goes over threading, bobbin winding and insertion, and many other little details to get you sewing.  And best of all the class is free! Its free to register there, too. But you do have to set up a free account. There are many other free classes in other crafty topics, but I haven't looked at them. 

Once you "buy" the free class it is yours to watch as often as you need. Plus, you can ask questions and get help as you go along. You can have your machine next to the computer and go through it with her, pausing if you need to.

If you are looking for a sewing book to get you going successfully, I recommend  The New Complete Guide to Sewing: Step-by-Step Techniques for Making Clothes and Home Accessories Updated Edition with All-New Projects and Simplicity Patterns (Reader's Digest). Take a look at the used books for a better price.

Sewing is such an enjoyable hobby for me, I want everyone to be successful! 


Craftsy

Saturday, July 20, 2013

My Craftsy Class

I had a little trouble getting my pattern for my Craftsy Class, the pattern got lost in the mail the first time they sent it. But, as always, their customer service was spectacular and I got a new one in 2 weeks. I haven't looked at my class for a while, I've been making things for my shop. I'm so happy I can do the class on my own time!

Anyway the pattern is Vogue V1263. The Donna Karan Collection.


I really like it, it is something I can actually wear when I make it.  I'm pretty sure I have enough of a knit for my first test jacket, but I'm not sure yet what fabric I will use for the finished embellished garment. Maybe something like this: Organic Cotton Jersey Knit Chocolate Brown 

If you haven't tried Craftsy yet, they are having a Summer Sale right now, It would be a good time to give them a whirl.


Sunday, May 12, 2013

Hand Stitching a Dragonfly

I'm just playing around while I'm watching my Craftsy Class. This scarf is made from some leftovers from a t shirt quilt I made.  I'm thinking I'm going to machine stitch it into half the width. And maybe add a small trim to the edges.


 I'm not sure if my stitches are a tad bit tight, I need to squint at some of the stitches on the videos.

And because the back is important too :)
 
 I'm really enjoying the class. Wow, what a lot of work goes into each garment!

Thursday, January 3, 2013

A Hand Sewing Question

I get questions in my email box from readers and I try to answer as honestly as I am able as much as I am able. This latest question I am answering here because it is so where my mind is at!


Diane: 
I found your blog while searching for hand sewing classes in Michigan.  Do you or anyone you know teach hand sewing garments in the style of Natalie Chanin and her Alabama Chanin clothing line?  I have several of her books, but I seem to learn better in a hands-on environment, not to mention that I know next to nothing about machine sewing.  I would appreciate any leads or help that you could give me.  Thanks.   
Cindy 

I had not heard of Alabama Chanin previously, but the whole thing is pretty fascinating! Have you taken a look yet? Please look.  I find it beautiful, but would never have the patience myself to do it ALL by hand. Just looking at it I plan in my head how I would finish it by machine. On the other hand, hand sewing can be very relaxing, maybe I could do it. I love how they offer a DIY version of the garments.
  
It turns out I won't be leading the sewing class next semester. There were some complaints because my 1 yr old was in the class with me.  I am disappointed, but it is a relief too.  It is a lot of work to plan for the class. There is a wide range of skill and interest levels and it varies wildly by project. I learned a lot and the invitation to teach is open when my kids are older.

Anyway, I chose the books I chose because I was thinking about hand sewing projects and using recycled materials.  I thought the Chanin book could be adapted to use with recycled T's. We could cut a girls fitted T into a shrug and use their embellishing and finishing techniques.


So, I know so far this hasn't helped Cindy very much! Here are thoughts directly for you...

I'd start with something smaller to gain skill and confidence, like the projects in Sewn by Hand. Consider doing some Chanin work on recycled T's or existing garments, less cost upfront, the structure is already there and you can enjoy the embellishments.

As for a class, I don't know of any. But there are several places to get together and ask around. The American Sewing Guild members might know or be able to help you with hands on help with stitches. The Southeast Michigan Crafty Meetups may also be able to help. Either with information or stitch demonstration.

I hope this was helpful. I enjoyed looking at the Alabama Chanin website. Thank you for writing :) 
  

Sunday, November 18, 2012

Great online community

Online Sewing Class

Am I the last person to hear about Craftsy?  They are an online community that offers video classes, workshops, patterns and projects. You pay a small fee (or try a free one) and you are able to permanently access the class. It can be viewed by you as often as needed, and you can save it until you have the time to work on the project. If you get stuck you can ask for help from the Instructor. They aren't just a sewing community, but have knitting, crochet and other craft choices. (but sewing is the important one, right?

I've taken a look at the Free Quick and Easy Bags course that the banner above leads to and so far watched half of it.  She does some things differently than I would (and the way she uses pins makes me cringe!) BUT, I have quite a bit of experience working with young and beginning sewers and I know she is trying to engage beginner sewersI firmly believe that successful projects are needed to grow skills and give new sewers the confidence to keep sewing. 

It IS a good first project and things can be refined later, when the desire for more knowledge starts to grow. 


Saturday, October 13, 2012

Needleworks: Session 1 - Recycled T shirt drawstring bag


I'm teaching a hand sewing class at our homeschooling co-op. The class is limited to 10 students, because my brain can only stretch so far.  I thought it would be fun to post what we are doing here.

Session 1: A recycled t-shirt drawstring bag.

Supplies needed:

 This tutorial starts out the same as the no-sew recycled T shirt I wrote here.

I lay the t shirt on the fold on the table or cutting board. If you are using  scissors, chalk your line. If you are using a rotary cutter, ruler and cutting mat, cut it now.(I prefer the rotary cutter and mat because it cuts nice and straight.  Someone once told me, buy the largest mat you can afford. Mine is almost 20 years old. Yikes!)


Nice and straight.


Here I am cutting 2 inch strips for the drawstring. You need 2 for each bag. This T needs to have NO side seams. I also discovered that the strips do not stretch correctly with printing on them, so don't use that part.

  Cut each once.


I brought a pile of strips and had the kids each stretch theirs. 


Cut an opening at each side. You do have to be a little more careful if there aren't side seams, to keep it even. Cut next to the side seam, not on it, if you have seams.


Ready to thread the casing.


Patiently, all the way through.


One side done.


Repeat. This time the ends come out on the other side.

Then we turned the bags inside out and used a needle and thread to do a running stitch all the way across. Of course you can do this by machine, but it isn't possible at this time to do these by machine at our co-op. So hand sewing it is!

Finished!


I did reinforce the bags with a machine stitch at home, because they were going to be used for 14 weeks to carry projects back and forth. (the link is for a good little machine, similar to what we use at the Aud, mine isn't available retail anymore)


Another option is to cut the side seams, at the bottom of the bag, about 1 1/2 inch up and put the cording through it for the straps to make a backpack!


Hope you enjoyed this tutorial, if you'd like to see it as a slideshow please visit my article here.