This is a fun and satisfying project for all skill levels. From beginner to experienced. It is also useful! I usually do this project early in the school year along with a felt needle book and its fun to see them being used all year.
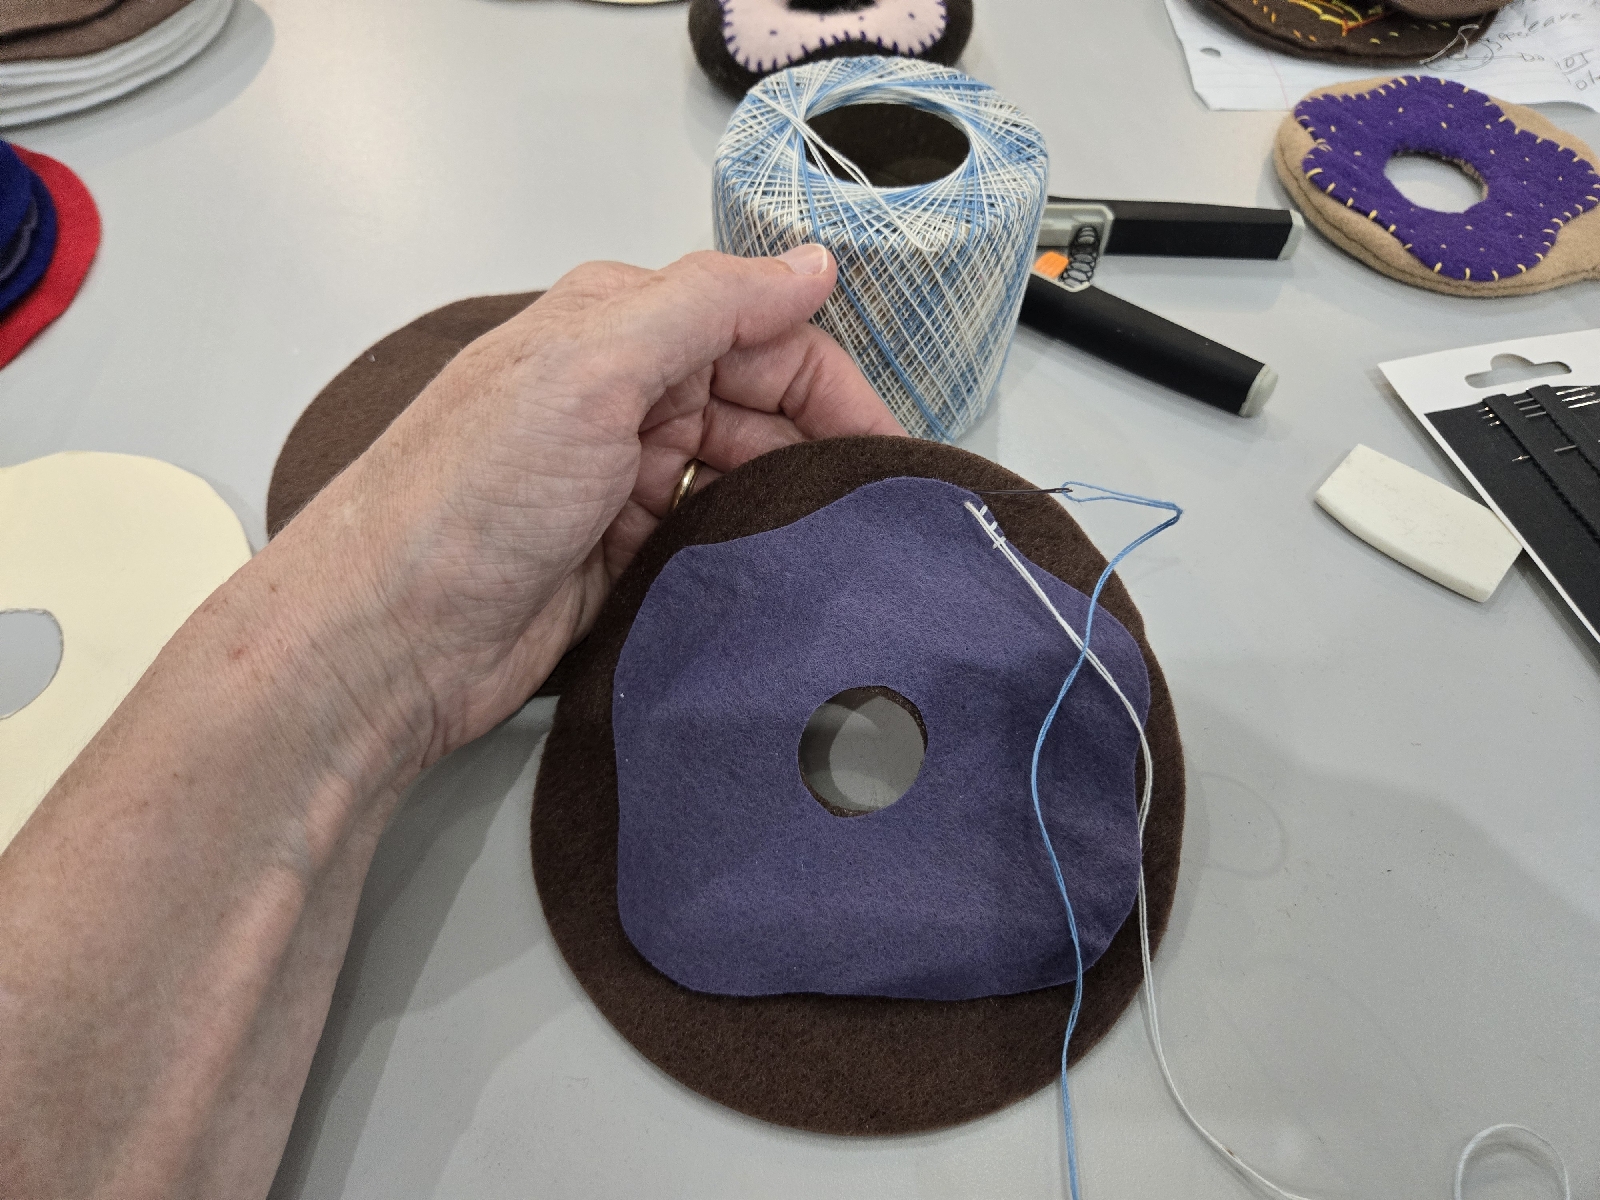
Supplies needed 2) 5 inch felt circles for the doughnuts, 1) 5 inch felt circle for the frosting. Cut 1 inch diameter holes in all three circles. Cut around the edge of the frosting decoratively. I have templates. It is important for the center holes to be pretty close in size and position.

I made a video. I stitch in real time. Time will tell if this is the best way to do a video. Unfortunately, I had background music playing. There were a couple copyrighted songs. I opted to have those sections muted, I may re do the video in the future. So there are quiet parts. If you have something I need to add clarity to, please ask in the comments here or on youtube.
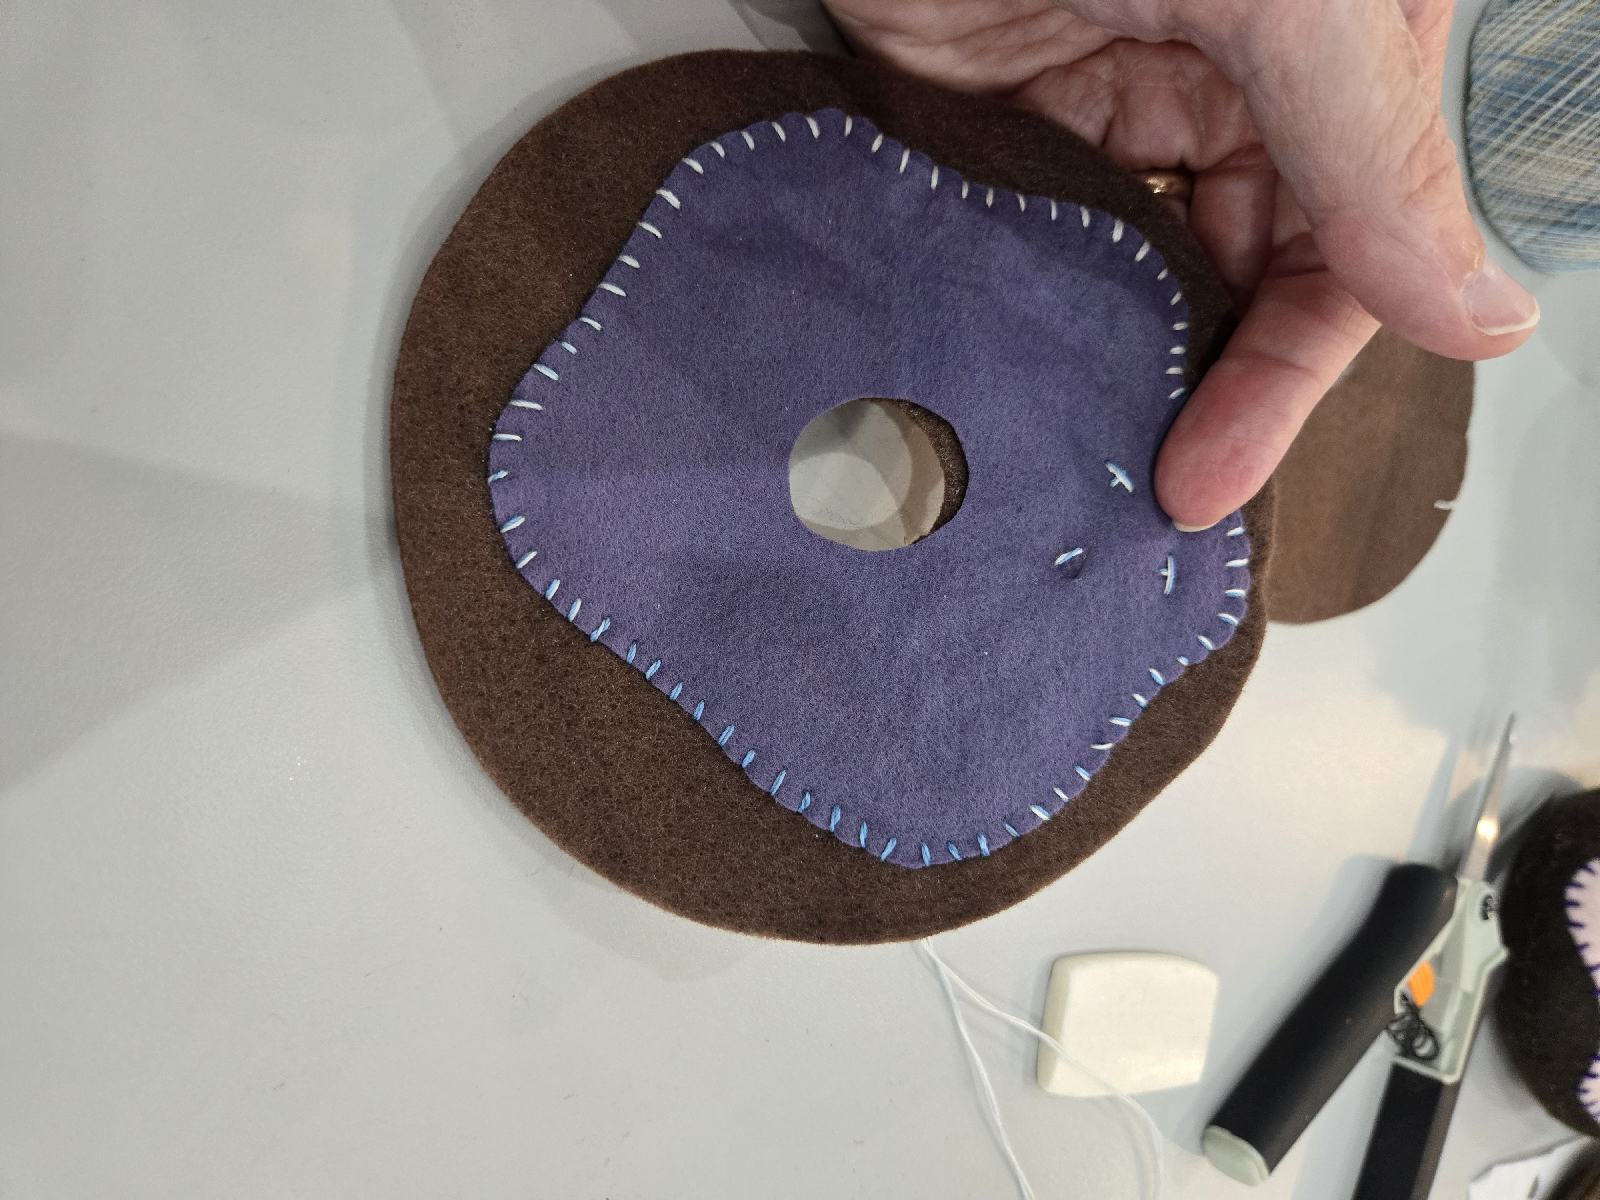
First add the center doughnut holes in the doughnut and the frosting.

Then stitch the frosting to one of the doughnut pieces. It can be as simple or as elaborate as you desire. I use a heavier thread or embroidery thread. I think I'm using a crochet thread, but I do a lot of second hand shopping and work with donations. So it works! I like to add sprinkles. This time I added an "x" for the sprinkles.

Next, right sides together stitch around the doughnut with regular thread. A running stitch works, but I ended up doing a backstitch.


Leave an opening. Do not stitch the doughnut hole yet!

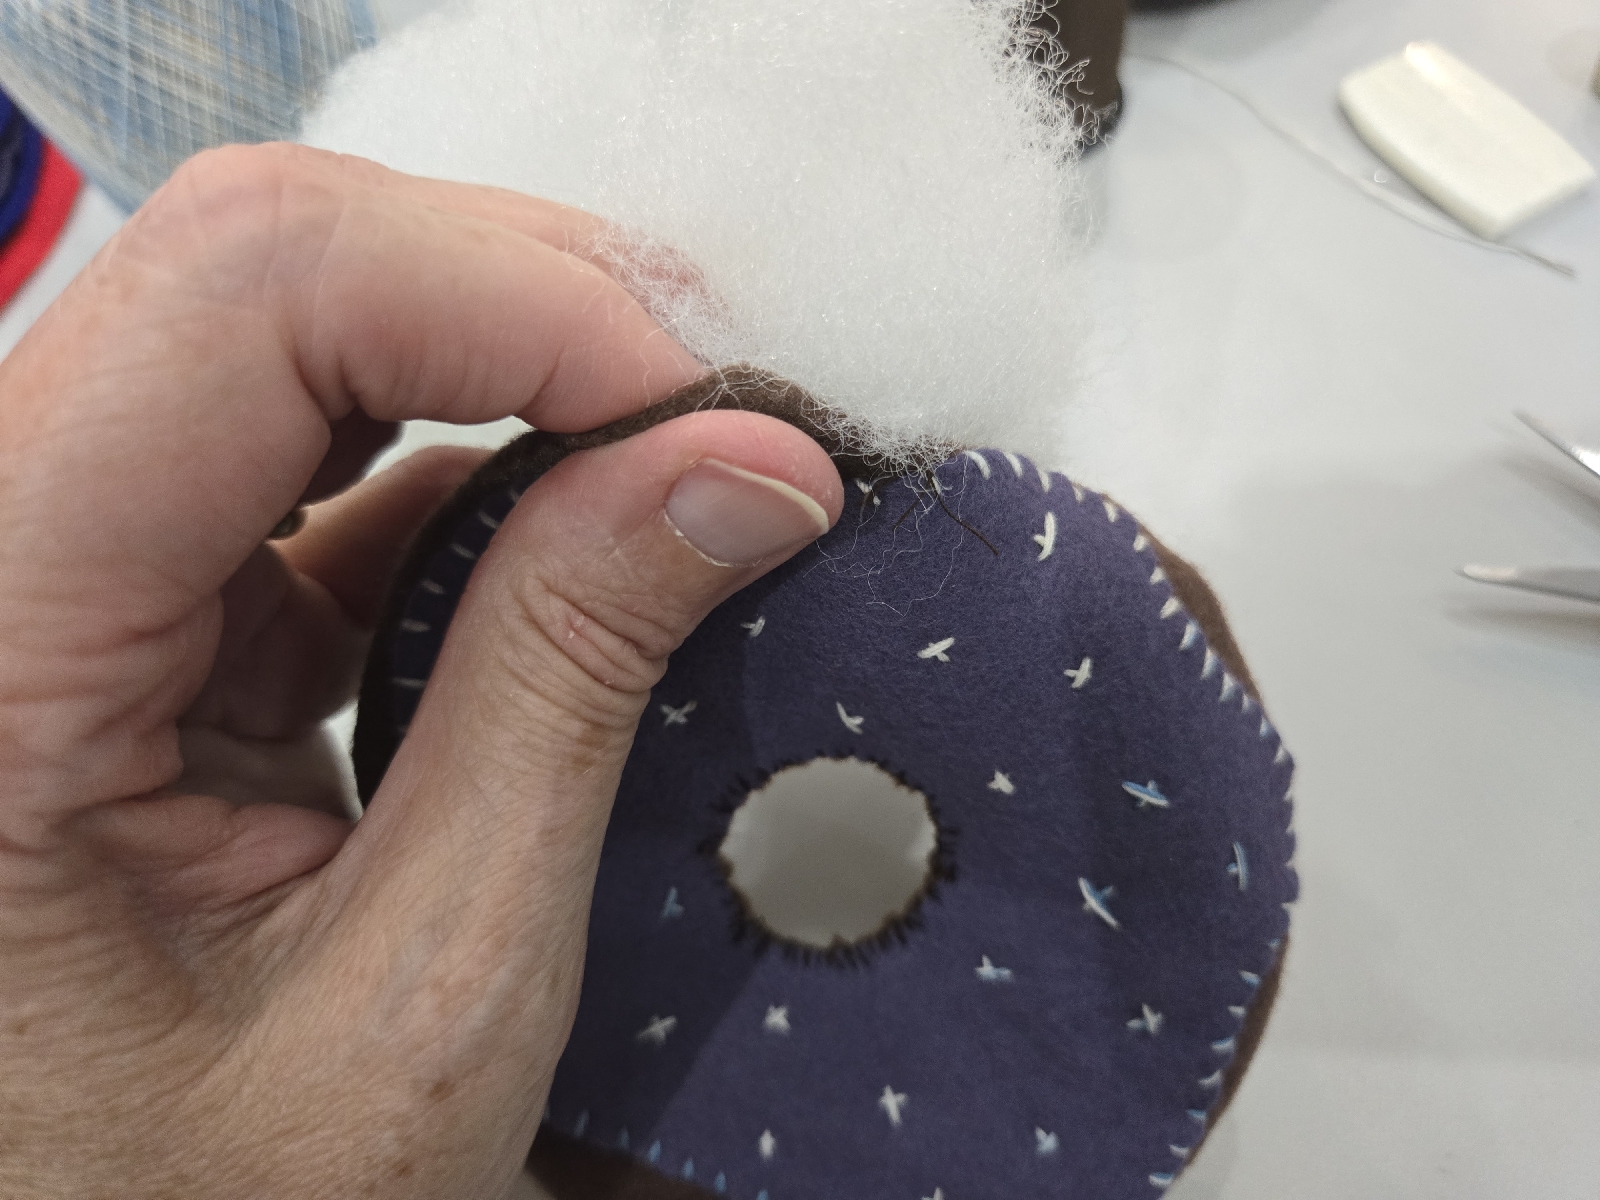
Turn right sides out. Now it is time to sew the middle. I use an overcast stitch. Make sure to catch all the layers and stitch close together so the stuffing will not show.

Stuffing time!

I closed up the opening with a ladder stitch. I didn't get a photo! Please look near the end of the video.
Success!!