90% Faster Than Rotary Cutters
Showing posts with label diy. Show all posts

Friday, August 2, 2024

Handstitching Project: Sew an Easy Felt Doughnut Pincushion

 This is a fun and satisfying project for all skill levels. From beginner to experienced. It is also useful! I usually do this project early in the school year along with a felt needle book and its fun to see them being used all year.

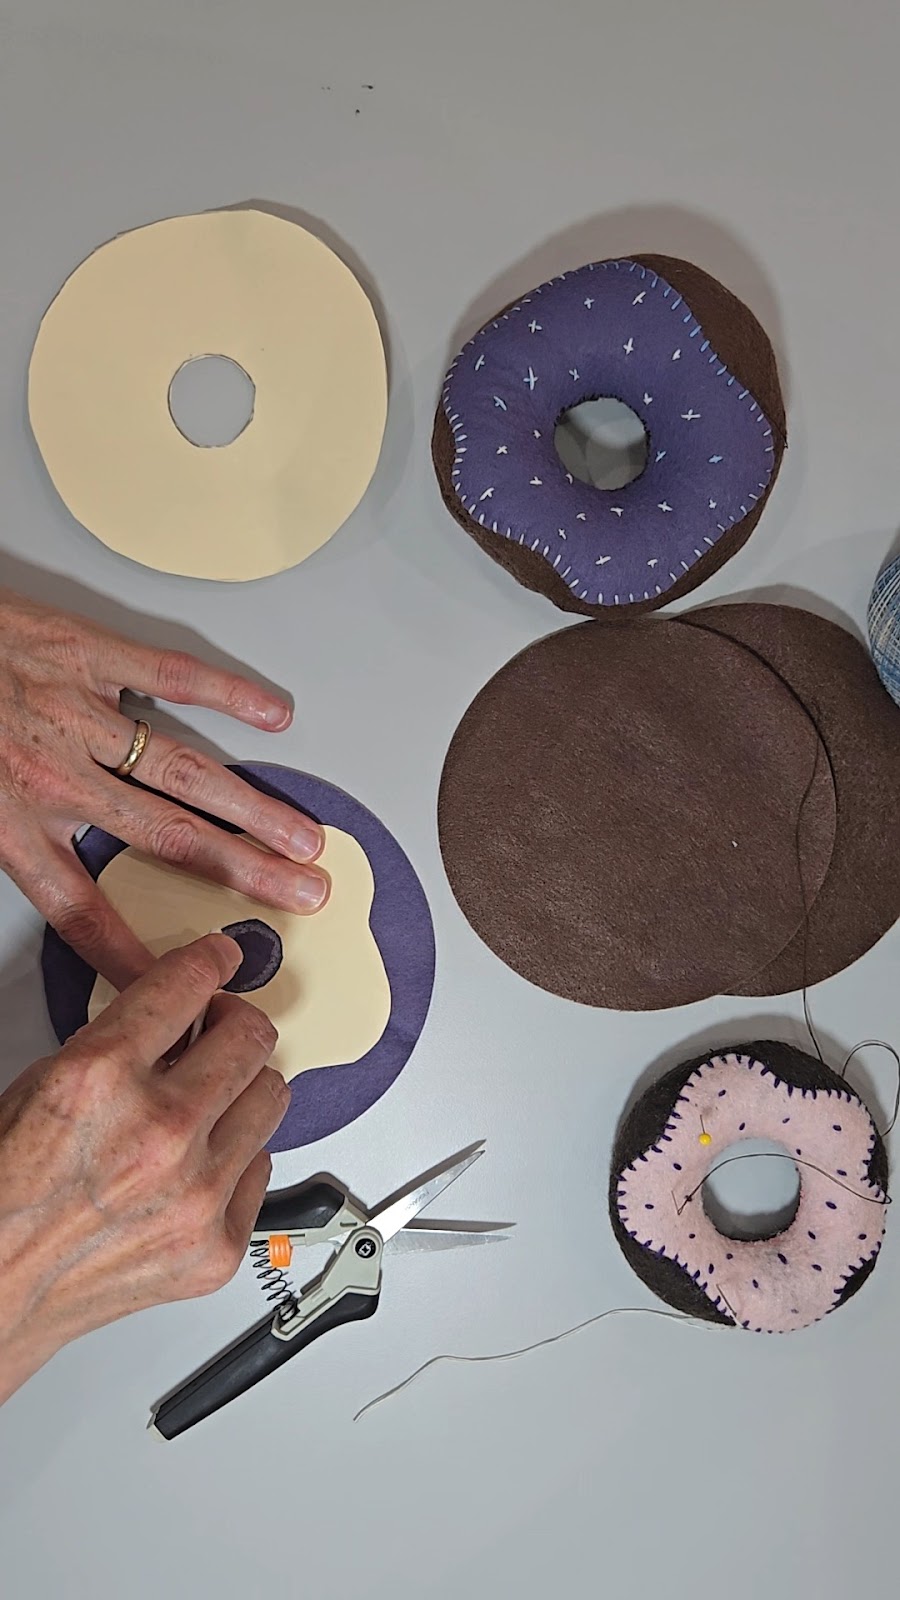
Supplies needed 2) 5 inch felt circles for the doughnuts, 1) 5 inch felt circle for the frosting. Cut 1 inch diameter holes in all three circles. Cut around the edge of the frosting decoratively. I have templates.  It is important for the center holes to be pretty close in size and position.


I made a video. I stitch in real time. Time will tell if this is the best way to do a video. Unfortunately, I had background music playing. There were a couple copyrighted songs. I opted to have those sections muted, I may re do the video in the future. So there are quiet parts. If you have something I need to add clarity to, please ask in the comments here or on youtube.  


First add the center doughnut holes in the doughnut and the frosting.


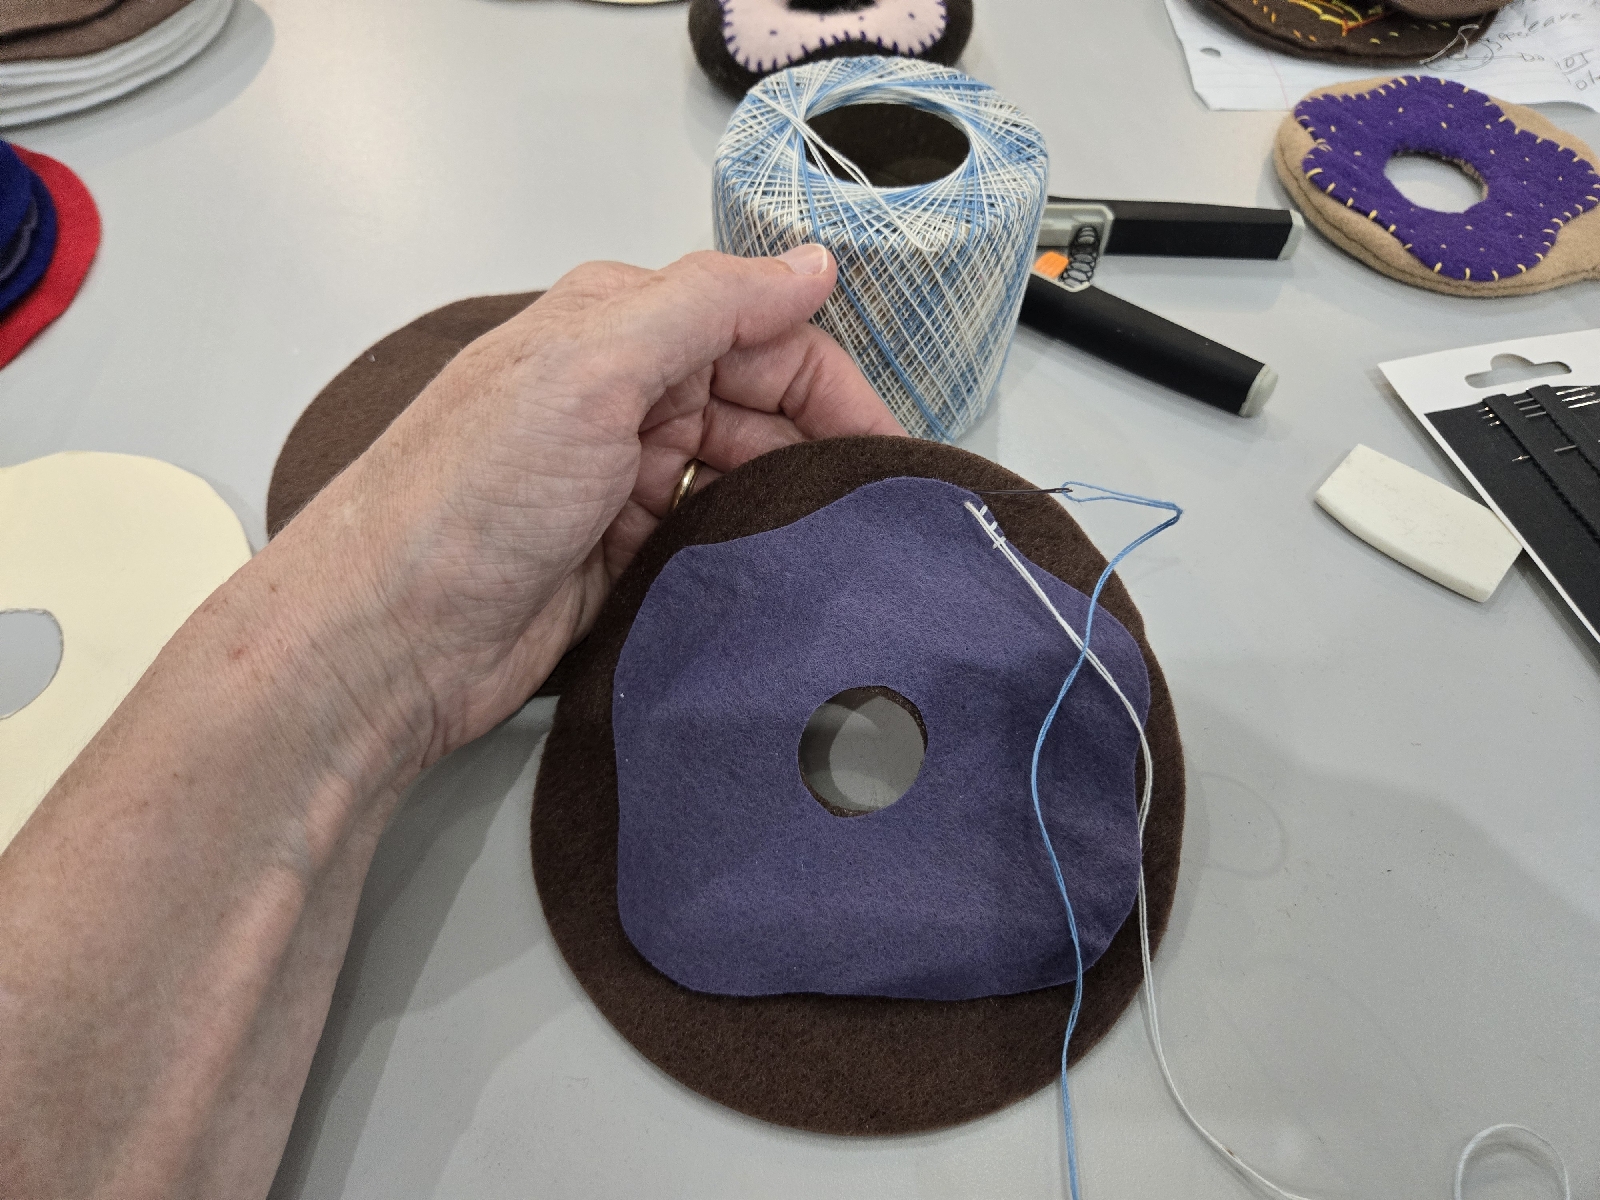
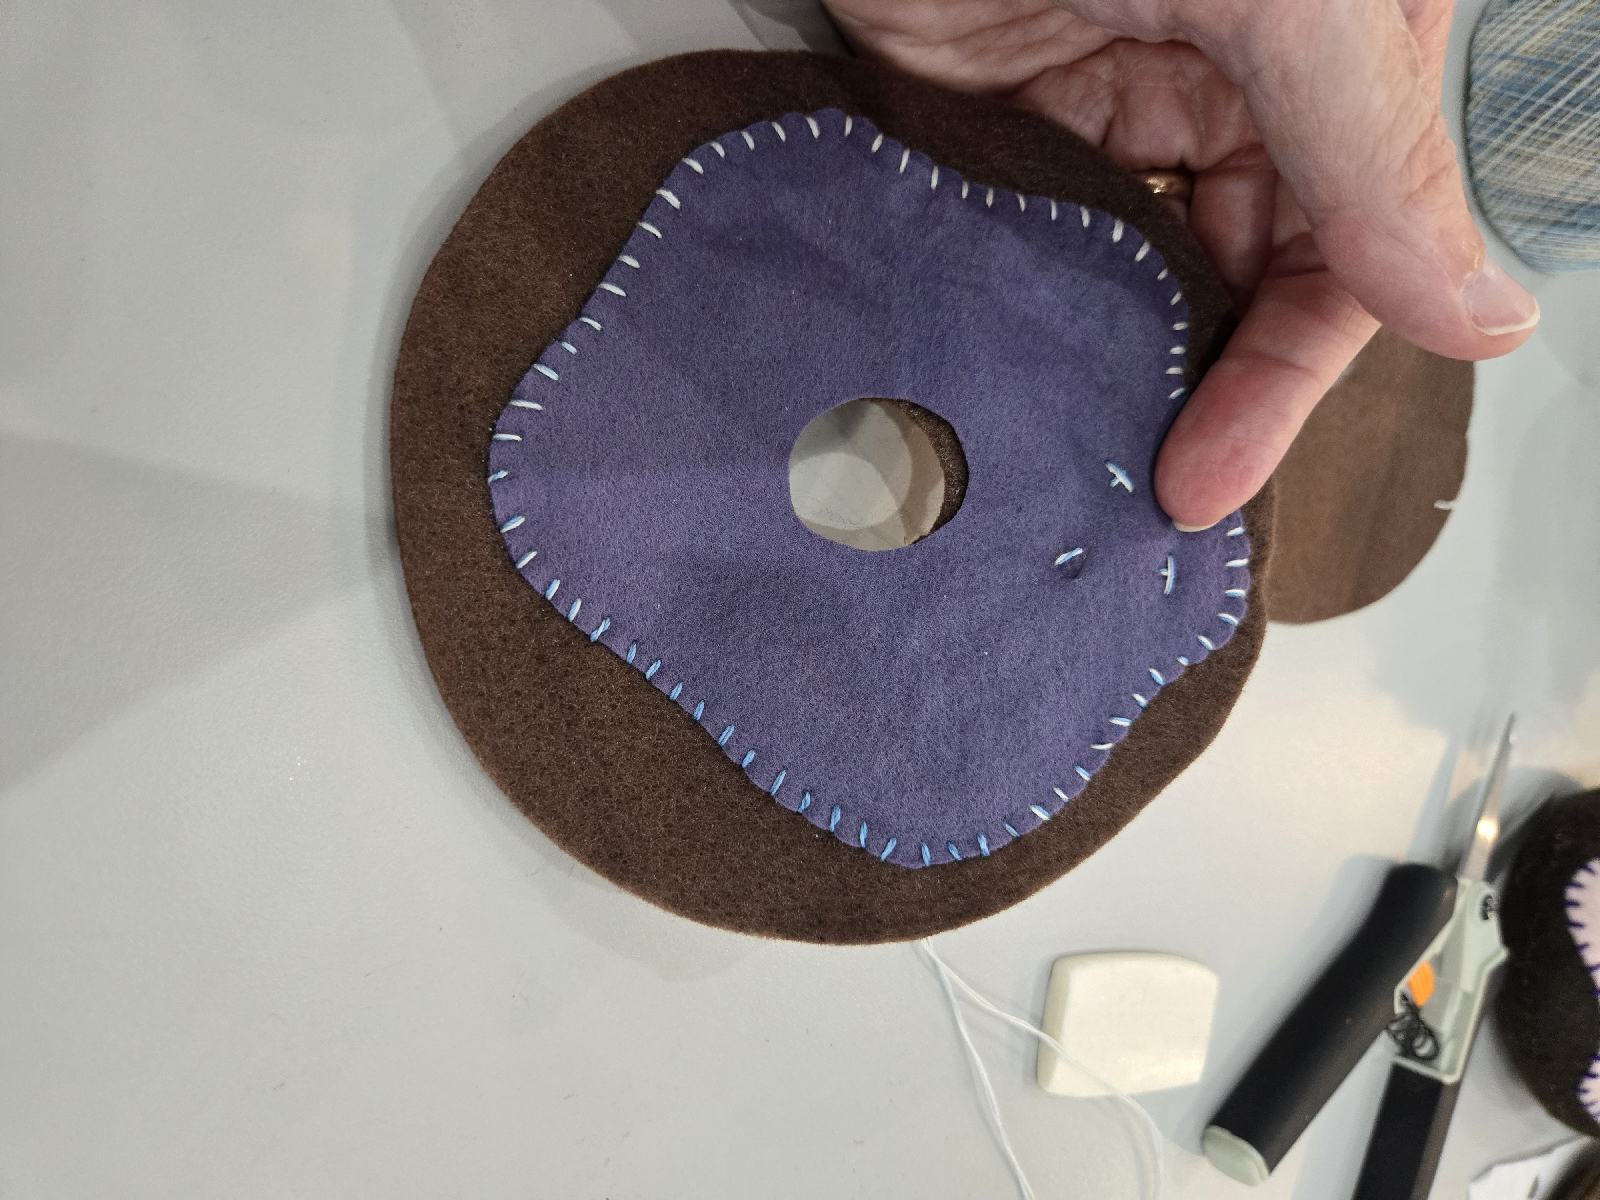
Then stitch the frosting to one of the doughnut pieces. It can be as simple or as elaborate as you desire. I use a heavier thread or embroidery thread. I think I'm using a crochet thread, but I do a lot of second hand shopping and work with donations. So it works! I like to add sprinkles. This time I added an "x" for the sprinkles.


Next, right sides together stitch around the doughnut with regular thread. A running stitch works, but I ended up doing a backstitch.


Leave an opening. Do not stitch the doughnut hole yet!

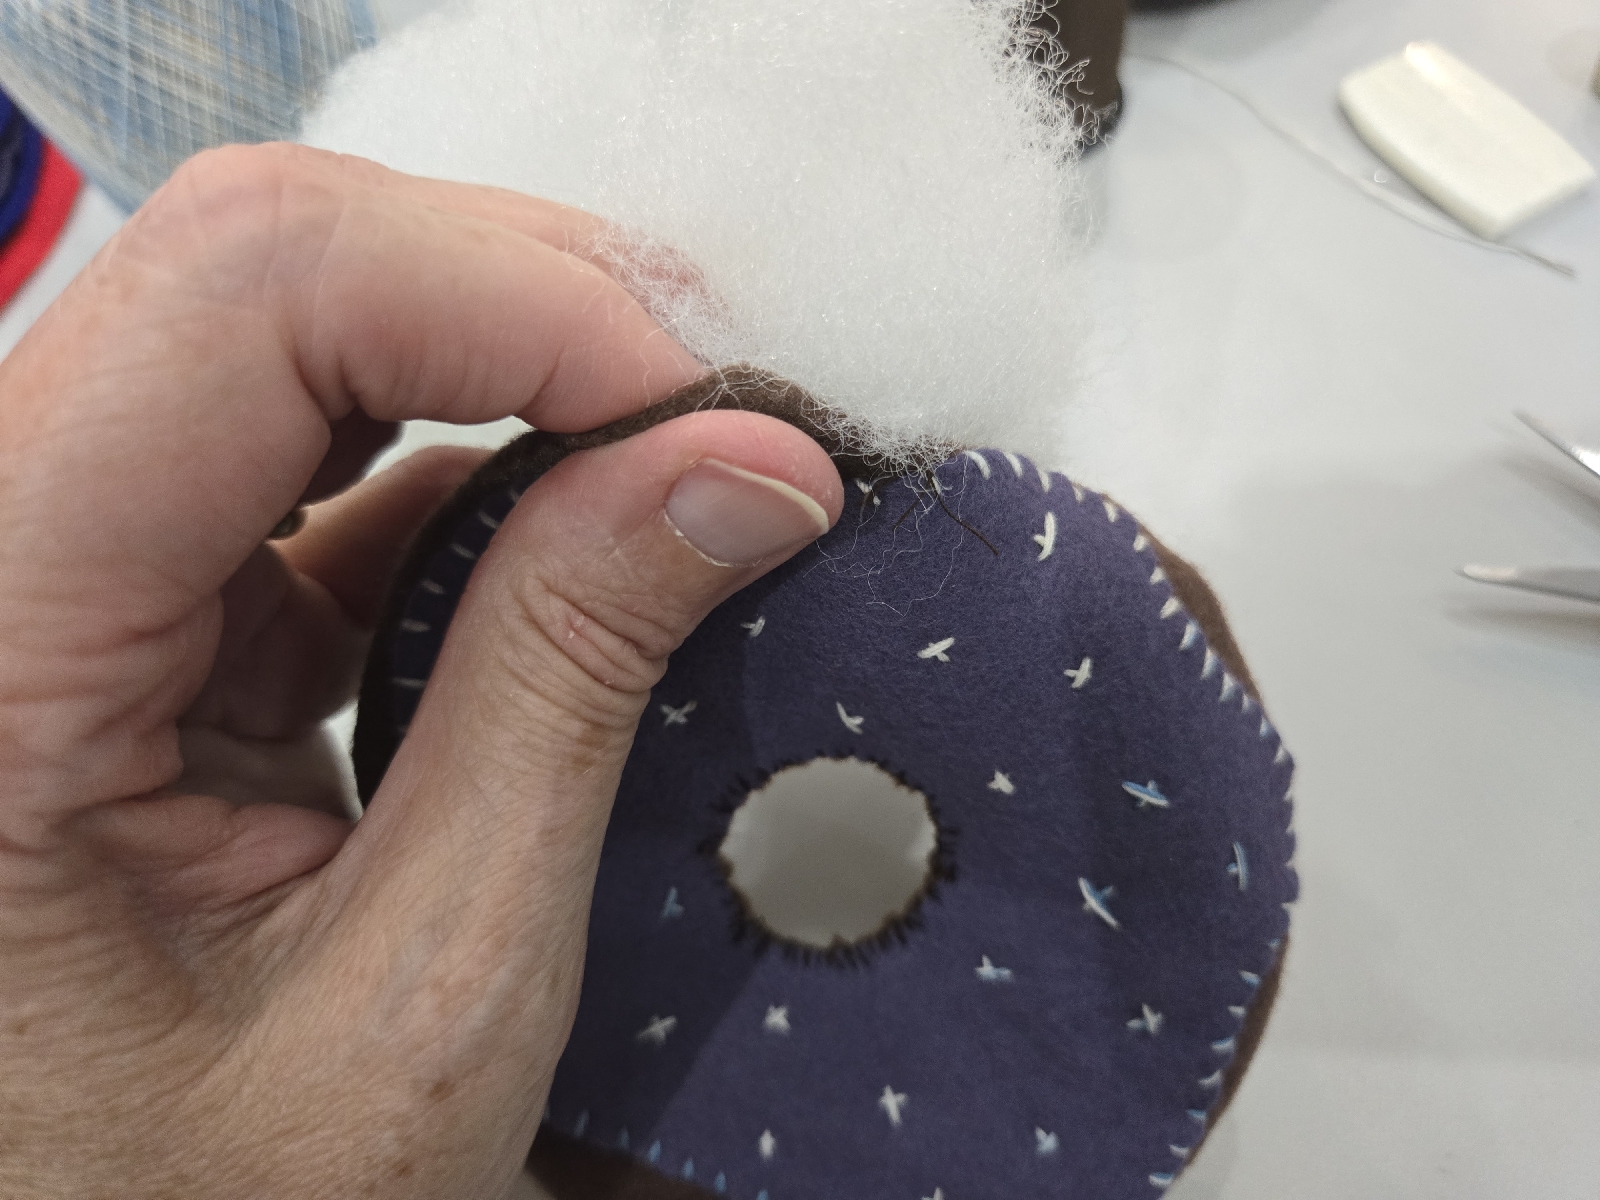
Turn right sides out. Now it is time to sew the middle. I use an overcast stitch. Make sure to catch all the layers and stitch close together so the stuffing will not show.

Stuffing time!


I closed up the opening with a ladder stitch. I didn't get a photo! Please look near the end of the video.

Success!!


Tuesday, July 30, 2024

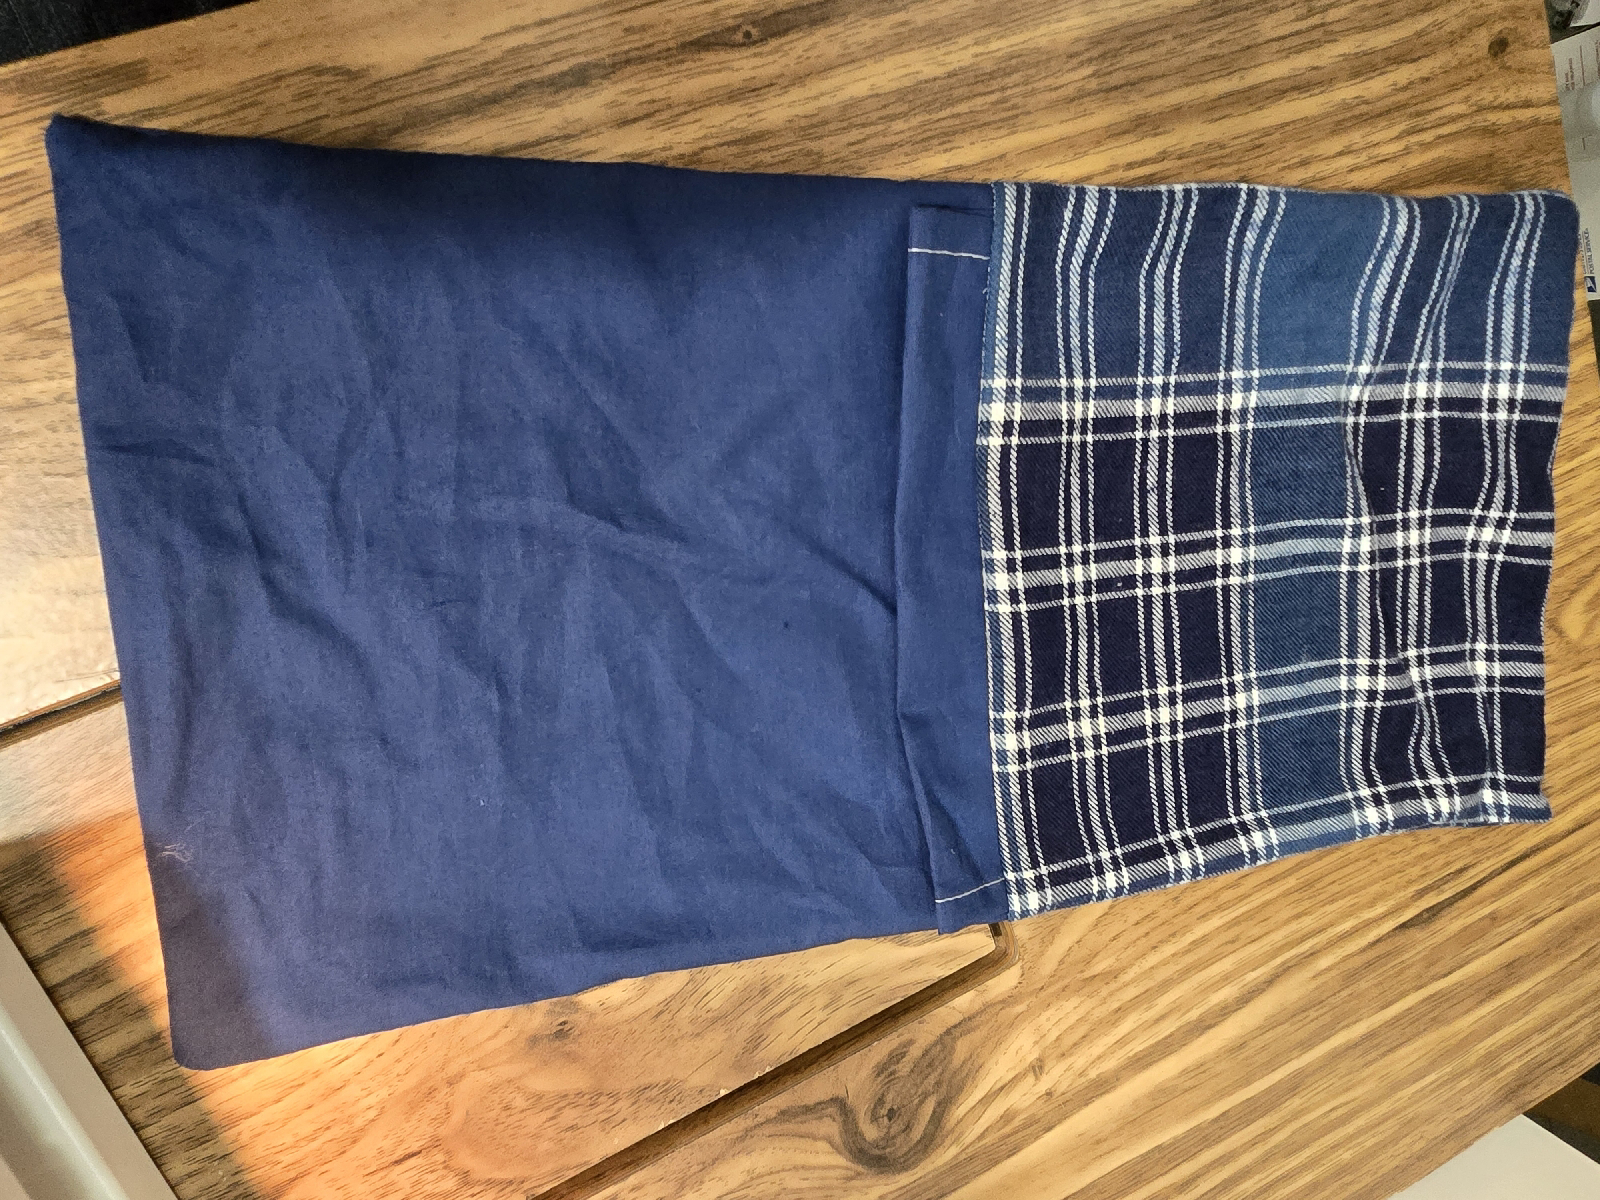
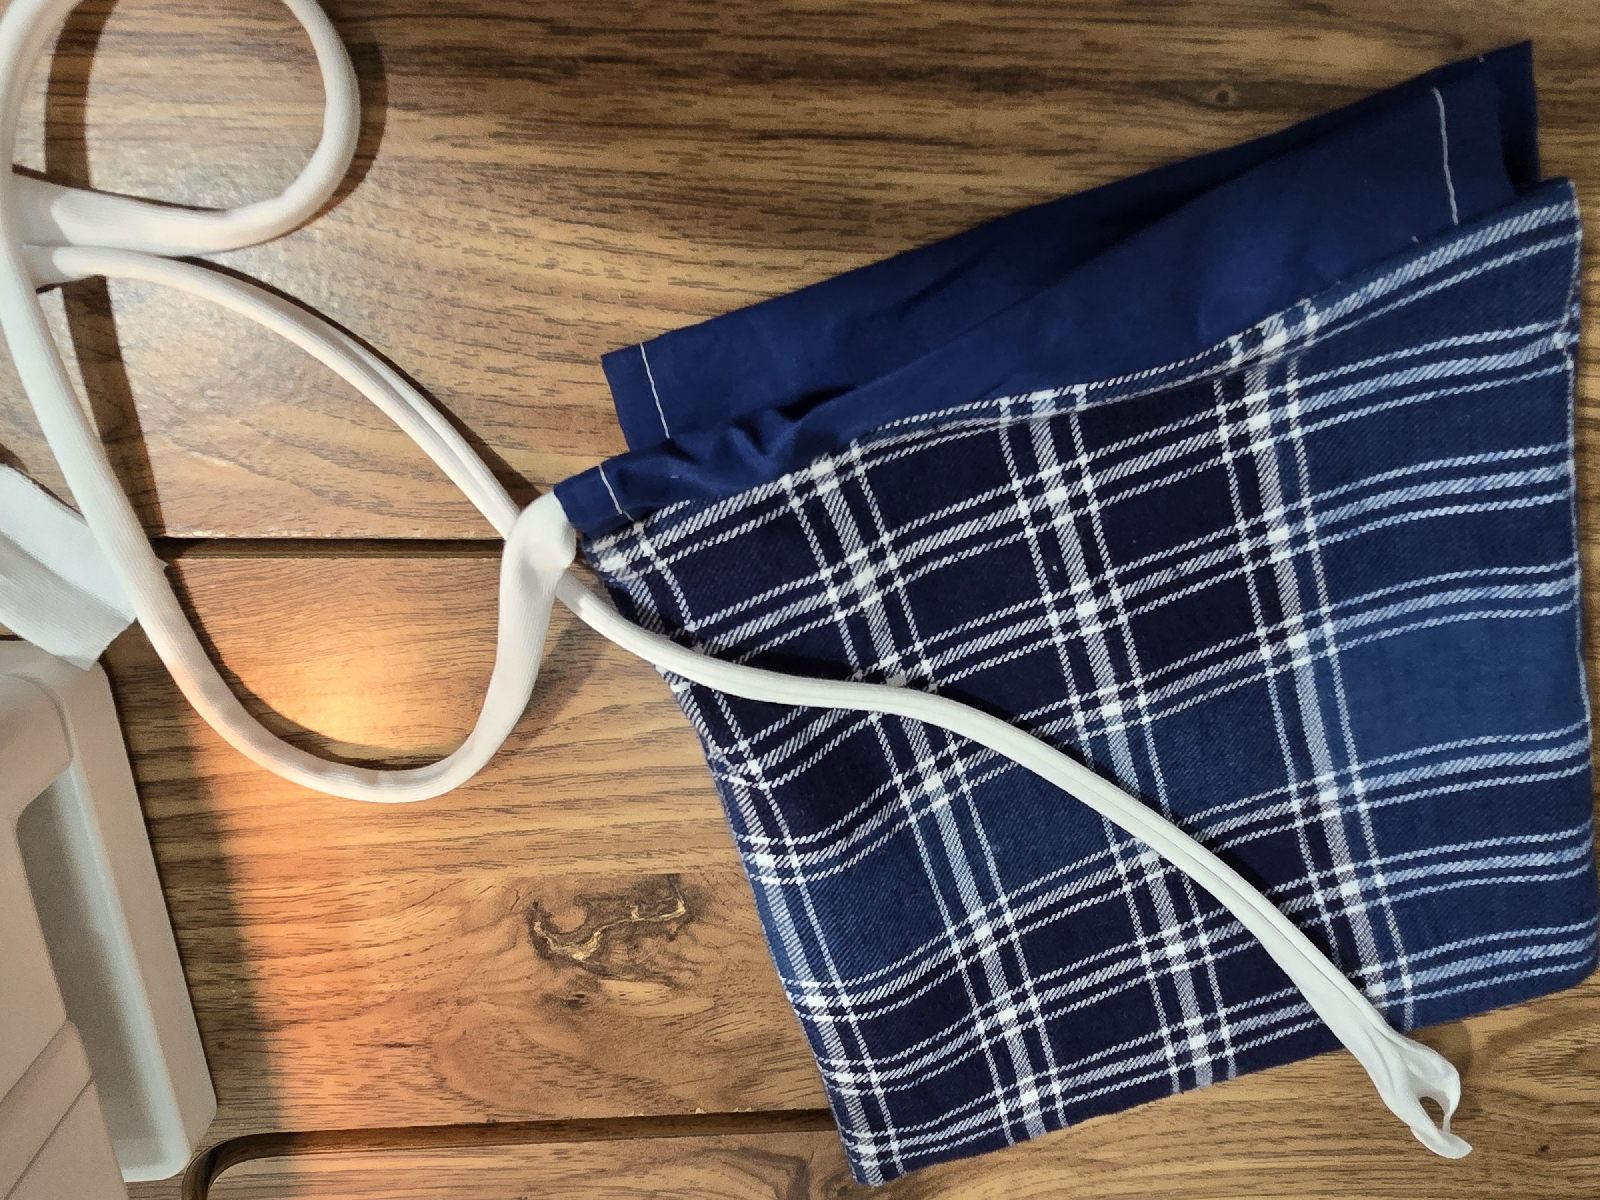
Easy Sewing Project: Make a Small Drawstring Bag

Supplies needed:
tee shirt knit 
(2) 1 3/4" x 21" 
cotton or cotton/polyester
(2) 3" x 10" for casing
(2) 10" x 10" for lining
(2) 10" x 10" for outside

I used my AccuQuilt cutter.

Hem the ends of the casing, double fold 3/8" wide.


Make a sandwich with the outer and lining, with the casing folded in-between.  Right sides together. 
Stitch all the way across. Backstitch at start and stop. About 3/8" seam allowance.

Match seams. Stitch all the way around, leaving a space in the lining to turn the bag right side out.
Watch for casing. You do not want to catch it in the side seam.

Turn right side out.

Stitch closed the hole in the lining.

Tuck lining in. Prepare to thread ties into casing.


Yay! Finished!

How many bags were completed in making of this video?
(Actually 6, my son confiscated one!)

Craft Haul! Fabric, Felt , and Fleece.

 Its time to start preparing for co op sewing classes. I picked up some fabric from a Facebook fabric swap group, some buy nothing local groups and Facebook Marketplace.


I use fabric cutters from AccuQuilt  it makes class prep go faster and lets the kids have more time for sewing. 

I plan to share some of my go to projects here and on youtube so be sure to follow if you'd like to inspire sewing in the next generation, or if you are just looking for some fun hand sewing projects for yourself!


Friday, July 5, 2024

Making Recycled Denim bags from Post consumer Jeans

I was lucky enough to get an order for 20 market bags. I decided to share the process as much as I can here and to practice making youtube process videos. 


These are the finished bags, my pattern is made from an old fashioned brown paper grocery sac.


A quick view on "Betty" to show the size.


I use box cutters and a variety of scissors to disassemble the jeans. There are numerous ways that this can be accomplished. This is how I decided to cut these apart.


The pockets, belt loops, and hems I sold in my Etsy shop. The inseams and waistbands I used for the straps on the finished Market bags.

This is a video I made earlier cutting the strips. I do use the same process on the market bags.


Then I sort the strips so my finished bags have lots of shades of denim.


Sewing my strips together.


Measuring and cutting the size I need.


Stitch the stack of cut pieces together.


Yardage reveal.


Bag assembly.


Finishing the Market Bag.


This is another example of how I cut the jeans apart to make something else.


I use die cutters in a lot of my denim recycling. This bag was made using strip cutters from here.


Friday, August 11, 2017

Recycled Denim Jacket with Circle Appliques

(this post contains affiliate links. Thank you!!)

 So, I've been recycling denim jeans for a while now. I'm working on creating a website, but for now the etsy shop will have to do. I'm selling in galleries and the response has been fantastic! I'm always looking for ways to make my denim more interesting and I stumbled upon the idea to add circles to my jacket and bags.


I started out cutting all the circles by hand, with a cardboard template and scissors, but you know that got old fast! Then I found these OLFA Rotary Circle Cutters and I thought I found what I needed to cut all of my circles! Nope. That too got old, and my fingers got sore. I tried many different hand held and automated cutters with frustrating results.


Finally, I tried GO! Baby Fabric Cutter . THIS was the equipment I was looking for. I still use the GO! Baby for the circles because I have two dies with various sizes, but as they get dull I will upgrade to the dies for the Accuquilt Studio Fabric Cutter.
Yup, I purchased the Studio Cutter. I had to! I use strip cutters with the Studio Cutter. It has enabled me to use up my scraps much more efficiently and cut down on the time I spend processing the jeans. 

I can get the GO! Baby to cut through two layers of denim and sometimes three if I stack it correctly. The Studio Cutter doesn't even notice four layers. I do have a Star Die and a small Flower Die for the Baby as well. They haven't gotten as much use yet, but I know they will. I also look forward to trying different styles as my business grows.

The Accuquilt website states "You may use the output (i.e., the cut shapes) resulting from the use of the die shapes Accuquilt licenses from third parties, as well as the output resulting from the use of Accuquilt proprietary die shapes, for any commercial or private purpose".  I LOVE this. Not only does the company acknowledge that their cut shapes are usable for any commercial or private purpose, they make it easy to find the information on their website.


Sunday, March 30, 2014

Recycled denim backpack and Playing with my embroidery machine

I've been thinking about making a denim backpack, this is one style.
 I have another one in my head too, unfortunately I don't sketch.

I've also been playing with my embroidery machine. I would like to make interesting labels. I need to learn a little bit more about how to customize it. I can't wait till my kids are old enough to help me figure it out!
 
 I'll try to keep posting my progress.

Monday, May 27, 2013

Denim Wrap Skirt from repurposed Jeans

I love how it turned out!


Now back to cutting!

Friday, May 17, 2013

The finished dragonfly scarf

I finished the scarf from this post.  I machine stitched a piece of 1/2" trim along an unfinished hem and then folded it right sides together, sewed and turned.  


 Inside and outside light, it is beige with taupe dragonflies. Aside from my impatience and using the machine, I think it turned out well. :)

Thursday, May 16, 2013

Tutorial: Make a shrug from a t shirt

I've still got hand sewing on the brain, but I wanted to make a shrug from a recycled/upcycled t shirt.

I did not do it by hand because I was into instant gratification

The first cut of the bodice is 13" from the neckline/shoulder.

 I cut a pleasing curve.
 I have a bin full of these hems.
 I also cut 1/2" strips for trimming.

 Sewing first strip.
 Second row.
 And the sleeves.
 These strips will develop more character with washing and wearing.
 Finished!