Wednesday, November 12, 2008

Make an Extra Large Thread Rack

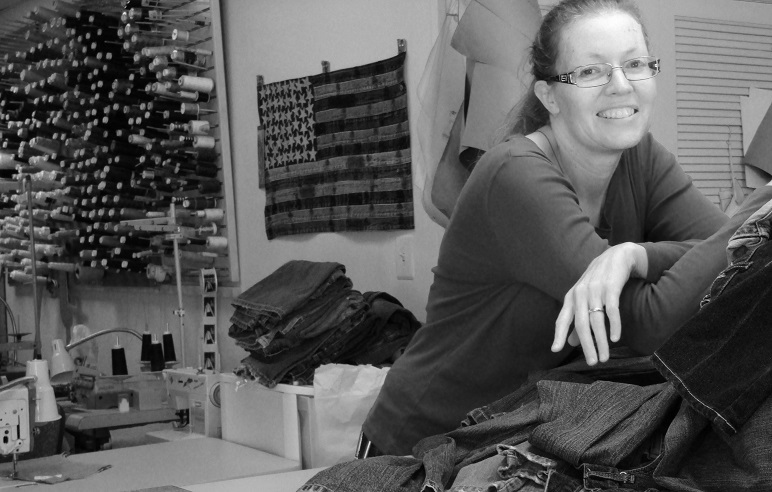
I'm in the process of moving my sewing work space from the basement to the attic. Ahhhh, sunlight. It has been down in the basement way too long. It will be crowded up here, but worth it.

I need another thread rack, so I'm making it again.

I get a piece of 2' X 4' peg board and 1/4" by 48" dowels and Wood Glue from a hardware store.

I used a dremel to cut the dowels into 5 1/4" pieces and proceed to glue them in, slightly slanted upwards.

thread rack

thread rack

I didn't put the dowels as close as I could have, you will have to experiment based on the amount of room you have available.

Hung up....

thread rack
I have 4 total, I'll take a pic of the work space when its all up here.

Friday, November 7, 2008

CraftStylish Sewing Room Contest

All you have to do, to win $7000.00 in prizes, is to use their room generator and "design" your "Ultimate Sewing room". There are over 1000 entries now so the judges who will be choosing the final 10 will have quite a challenge. The winner will be chosen by us peeps!

The Contest. Don't forget to register or log in before you start!

Check out my "Ultimate Sewing Room!

Wednesday, November 5, 2008

More Patternmaking, and Tools

I suggested some pattern drafting and draping books in a previous post ,but I failed to mention necessary tools. A few good rulers, a tape measure and some curved rulers are necessities.


I own a set of Fairgate rulers, plus a bunch of misc. ones.
pattern drafting tools


I've also acquired some additional books because I went and looked and bought some after the last post...
more Patternmaking books

I picked up a copy of The Practical Guide To Patternmaking For Fashion Designers: Menswear because I also am interested in sewing for Men. The suggested books at the bottom lured me in and I got Classic Tailoring Techniques: A Construction Guide for Men's Wear too, because I made a man's costume jacket once for a relative and had trouble with the construction. Menswear has different rules than womenswear, because suits are much more structured for men that women.

I also now own a copy of Donald McCunn's book How to Make Sewing Patterns. Mr. McCunn has a Yahoo! group dedicated to making patterns and makes himself, as well as many other talented individuals, available for answering questions. He is also offering online classes, I signed up for the first one, but became ill and was unable to participate. And things have been too busy around here to try another one this year. The concept of the first class was unique, we were to draft aprons for a wine bottle. It was a cost saving idea, a wine bottle is much cheaper to obtain than a 1/4 size dressform, yet still requires darts for proper fitting.

Saturday, October 11, 2008

American Sewing Expo, Baby Lock Passion for Fashion 2008, Novi,MI

If you can't tell by my other posts(day 1,day 2,day 3), I really enjoyed taking part in the challenge. I was surrounded by wonderfully talented sewing enthusiasts/designers/patternmakers (one here and here)and my regret is that we didn't get to spend time together without competing.

The final garments:
Passion for Fashion 2008

Passion for Fashion 2008

Passion for Fashion 2008

Passion for Fashion 2008

Passion for Fashion 2008

Passion for Fashion 2008

At least 2 of the contestants were only 18, and I'm amazed at what they can do. I did not have the confidence or composure at that age to enter such a contest and succeed as they have done. Many more pictures here. Choose Passion for Fashion Show or PFF in Progress Galleries.

In one of the filming sessions I was asked if I would join the contest again, I amswered quickly, "no". I didn't have an answer when they asked why? At the time I was thinking, Now I know what its all about I don't have to do it again. I think now that perhaps I would do it again someday, but not for a couple of years, Maybe.

If you think you would like to try the contest, I'd send in a garment. On Sunday, we had the opportunity to take any classes, compliments of the American Sewing Expo and the Experience more than pays for the $25 entry fee!

My serger and entry garment and winning outfit came in the mail/AmEx on Thursday. All contestants also received a American Sewing Expo 2008 tote, Easy Zippers DVD, Rowenta Iron, and Kai Scissors (mine came in really handy during the contest!).

Pashion for Fashion American Sewing Expo 2008 Prizes

This serger is really cool! I have a lot of learning to do there. It can sew with 8 threads at once! I was really wanting a coverstitch machine and this has that and oh so much more. My "local" Babylock dealer is Sandy's Sew and Vac, they said I could come in and take as many classes as I needed to get comfortable with the machine. I'm sure I will need at least one. The folks there are very friendly and helpful, if you're in Michigan (Dearborn Heights (313) 292-2660, Lincoln Park (313) 388-7350, and Livonia (734) 266 2491, They do free estimates!)and looking to try out a Babylock I recommend going there even if its a bit of a drive.

Saturday, October 4, 2008

Day 3: The Fashion Show, The Winners!: Saturday September 27, 2008, Baby Lock Passion for Fashion Challenge, American Sewing Expo, Novi, MI

The Final Day!

Saturday Time Line

3:00-5:00 Designers finish up garments and take models to dressing area behind the fashion stage. (Models must have their own make-up done and their hair needs to be up off their shoulders)

6:00 Kayla introduces judges. Then explains the contest and scenario. Then introduces the first designer (in alphabetical order) with their model.
-The designer stands on the stage by Kayla and the model walks down to the middle of the runway and stps, looks to the left at the photographer and waits for the photo, then continues down the rest of the runway and back up to the designer. Then both the designer and the model walk off the end of the runway together and go behind the stage.
-After the last designer and thier model have done the same as the rest, the judges will confer to pick the 6 finalists and...
-During that time, Kayla will announce the door prize winners
-Judges will then give Kayla the top six names
-Kayla will announce the 6 finalists and they will return to the stage with their models.
-Each judge may ask 2 questions only (10 questions total from all judges) and to different designers. (not2 questions to each designer)
-All designers, models and judges are to leave the fashion stage by the side.

7:00 Kayla will introduce Kenneth King and he will speak for 1/2 hour.
7:00 Kayla will announce that the dressforms that the designers used were generously provided to us by Prym-Dritz and thank everyone for coming this evening. Then announce the prizes.

All twelve designers won:
-An American Sewing Expo tote bag
-An Easy Zippers DVD from Islander Sewing Systems
-A DX8900 Professional Stream Iron from Rowenta
-3rd place winner will also win a Baby Lock Decorator's Choice Sewing Machine (Prizes valued over $1400.00
-2nd place winner will also win a Baby Lock Evolve Serger Machine (prizes valued over $2800.00)
-And the 1st place winner will also win a Dress Form from Prym Dritz, a trip to NYC from the American Sewing Expo and the Baby Lock Espire Sewing Machine from the Baby Lock Corporation (prizes valued at over $5700.00)

The 6 designers and their models will be asked to return to the stage and Kayla will announce the three non-winners, (and they will leave the stage by the side area) and then Kayla will announce the 3rd place winner up repeating her prize. Then repeat the 2nd and 1st prizes again (before announcing the winner) and then announce the 2nd place and 1st place Winners. Photos wil be taken with the top three contestants and the Baby Lock Dealer.


(There were some variations to the program but as far as I know the times are accurate)

I decided Friday night and Saturday morning that since I had enough fabric to redo the Jacket without puffy sleeves, 7 hours of sewing (8am to 3pm) was plenty of time to redo the jacket.

I got my muslin out again and this time was able to fix the shoulder slope. It just fell right into place on the dressform. I shortened the shoulder and opened up the neckline. Then I had to make the sleeve not puffy. I can't draft a sleeve really, its more about trial and error and then fudging to get what I want. Not something that I can do in one sitting, so back to the Pattermaking book. I saw how to make a normal sleeve puffy so I thought I'd just do it backwards. A little messy and time consuming, but it did end up working.

sleeve

My cousin came to visit me again at lunchtime, I can't remember if I had the jacket started at this point, but she did get me thinking that it was time to get the stuff cut out and put together. I got the jacket in wearable condition just before we had to go and see the models for the final fitting at 3pm, but the flounce around the front and hem was sitting funny at the top and the sleeves were unfinished.

I was pleased with how well the skirt and top fit, but the jacket was too big. I knew I had to do something to it.

I made the scarf after returning to the arena, the Baby Lock Evolve Serger is pleasingly fast.

Someone, Kayla or Becky announced that it was quarter to five and suddenly I remembered that I was in a timed Contest. I realized I had to fix the too big top and finish the sleeves. That was the first time I felt rushed in the whole contest!

I put the elastic in the back to give the jacket some shape and managed to finish the hems and flounces in spite of the fact that the flounces were a bit too large. Just in time! It was a relief to finish the Challenge and just have to go thru the motions to see who won!

The fashion show went mostly like described above. And now what you've all been waiting for!!!

The third place winner:
Raminta Vilkiene, Livonia, MI
3rd Place:Raminta Vilkiene, Livonia, MI

The 2nd place winner:
Me!
Unfortunately I can't share any scenarios except my own because I couldn't hear backstage. Mine was: She works in a conservative office building and is going to a Gallery opening in the evening. The jacket is brown on one side and matches the skirt and the reverse is the bright color shown below.
2nd Place: Me!

The winner:
Angie Wolf, St. Joseph, MI
1st Place:Angie Wolf, St. Joseph, MI

Thursday, October 2, 2008

Day 2: Friday September 26th 2008, Passion for Fashion Sewing Challenge, American Sewing Expo, Novi, MI

Finally, we get our challenge:

2008 BabyLock Passion for Fashion Scenario

This year's challenge is to create an outfit the goes from the work place to an evening event. You will be asked to explain "who she is", where she works and what the evening event is. You must also base your outfit on one of the following four elements of nature; earth, wind, fire or water. You have 30 minutes to sketch and or select a Simplicity pattern (optional) for your sloper (remember this must be your design).

Next, starting at 9:00AM you will have 1 hour and $100 to shop for your project. You must return with receipts.

After shopping you will return to the BabyLock Passion for Fashion Sewing Arena to create your challenge garment.

Your mentors are award winning fashion designer, Kayla Kennington and her assistant Becky Fulgoni, the second place winner of the 2007 BabyLock Passion for Fashion. For assistance with the sewing machines and sergers Christine Tryon from BabyLock will be in the Arena.

ASE will provide a box linch for each contestant that will arrive in the Arena around noon on both Friday and Saturday.

Good Luck!!


So in the 1/2 hour before we went shopping, a couple things happened to me. I got stuck on a reversible jacket, earth, and brown. Then we got to see the patterns we could use. There were 5 or 6 I chose 3 of them (Simplicity 2933,2801 and 2951).

Passion for Fashion Pattern choices

Unfortunately, there were no jacket patterns, I'm pretty sure they were all dresses with empire waists of something going on in the front. I chose three and hoped to use them as a sloper. I can draft patterns, but it is very hard for me. I'm a seamstress #1 (but you can bet after this, I'll be spending more time with the patterndrafting books!)

Now time to shop, they weren't really holding us to a 1 hour only shopping time, and we were going to be allowed to pick up something extra if we needed it.

I stalked the aisles searching for fabric stalls, many of the stalls contained beautiful fabric, but at a higher price point than was possible for building an entire outfit. I knew I needed something snazzy for the evening side of the jacket, but I still needed to decide on fabric for the jacket and skirt, and see what I had left over.

Then I found Vogue Fabrics. Jackpot! Tons of quality fabrics for 3.99 and 5.99 a yard! (I'd guess most of the contestants bought at least some fabric here!) I was still wanting a wool blend because I wanted the stability, but I did have to adjust my plan, for the first time of many, and settled for a really great rayon with weight. I got 5yards at 3.99. I do have to add here though that Becky gave me a little push to get started, I was spending too much time trying to make what I have in my head somehow appear in the bolts.

I wanted something shiny for the inside, I had seen shiny and stable at Stitch in Time (281 265 2515), and wandered back over there for a look. The Burma Silk caught my eye, because it was stable, shiny and $32 for 3 3/4 of a yard, sold in little packs. With the help of the patient woman who worked there, I chose a bright color(outside my comfort zone) with subtle streaks of brown in the mix to make it a match.

One more stop to Haberman Fabrics for a bit of 7.99 brown silk I spotted in the sale aisle. I bought 3 yards because I was going to make the sleeveless top on Simplicity 2933, but again ended up changing my mind.

I spent the morning working on a jacket sloper. I was using the sleeves from 2951, I thought I wanted puffy sleeves, and sleeves and arm holes are particularly difficult for me. My cousin stopped by around noon and I had nothing to show for the day, so I decided to switch gears and actually accomplish something.

I used the neckline and arm holes from Simplicity 2933 to draft my tank top. I used two layers because the fabric was sheer. It is self faced and the hems are finished with a rolled hem and slightly longer underneath.

I got attatched to the idea of flounces at about this time and made a little bias skirt with an 8 inch flounce (flounces are found on pg. 173 of Connie Crawford's Patternmaking Made Easy book, I could not have managed to create an outfit without this book)
Skirts I can draft, and I'm fond of bias for a number of reasons. I'm not sure what time it was after all this, but finally I was confident that my dear model wouldn't have to go down the aisle in "the emperor's new clothes"! I was also very pleased with how these first garments had turned out.

Back to the jacket.....

I got help from Becky again and fixed the side seam, but the shoulder slope was still wrong. I needed to have something to show for the day so I cut out the jacket, using as little fabric as was humanly possible and put the parts together so I had something to think about. I decided I didn't like the puffy sleeves too....

This was the end of the day on Friday, Day 2:
Dress forms generously provided by Dritz!

End of day 2

End of day 2

Monday, September 29, 2008

Day One: Thursday Sept 25th 2008, Babylock Passion For Fashion Sewing Challenge at the American Sewing Expo in Novi,MI

The contest is over (And the results are in!), but I'm going to go day by day and fill you in on what happened each day.

I was due at the expo on Thursday night at 5:45, unfortunately I was about ten minutes late. I missed the trip the Finalists display.

Shown Below...
Babylock Passion For Fashion 2008 Finalists

Babylock Passion For Fashion 2008 Finalists

Babylock Passion For Fashion 2008 Finalists

Babylock Passion For Fashion 2008 Finalists


That's mine in the corner, with someone else's shirt on top. What an amazing array of talent represented here! I'm actually glad now that I didn't end up seeing this display until the end, the garments are very intimidating!!

First, we met our mentors (I'm sorry I didn't get a picture of them!) Kayla Kennington and Becky Fulgoni (scroll down). I've heard about Kayla before and she has been featured in magazines, Becky was totally new to me, but turned out to be a fabulous inspiration. Both are great seamstresses and I have no complaints only compliments about how well they mentored.

Next we all sat around and introduced ourselves. The youngest was 18 and the oldest was not me!! But I do think most of the contestants were in their 20's and I in my 30's was in the top four if not in the top two oldest contestants. Its hard to guess.

We had varied backgrounds, from design school to businesses, at least one other contestant sells on Etsy and four of the contestants were returning for a second try at winning the contest.

We were introduced to our sewing machines. A Babylock Espire

Babylock Espire

The sewing machine was really cool. An automatic needle threader (one of the easiest I've seen) and buttons for thread clipping, needle up, as well as many features I didn't have the chance to discover. The bobbin can wind while I'm sewing and the thread automatically positions itself correctly and doesn't reqiure holding (or doesn't pull itself unthreaded right when your hands are full!!)

and our serger a Babylock Evolve (waaay over to the left....)

Passion For Fashion 2008


The best thing about the serger was Christine! She was there for sewing machine support and did all the thread changes for us at the show. In fact we didn't even get a intro on these, because she was available to quickly take care of it. How is that for easy serger thread change!!

Next it was time to meet the models. They were all lovely, and I found myself analyzing each of them as they walked down the runway. We ended up choosing our models by drawing numbers out of a hat. This was the fairest way. I ended up with a model named Breanna. We all walked over to the sewing area, measured the models and were done for the evening!

Day One: Sewing space

I had a really hard time sleeping with all the nervous excitement, but the next day did arrive!!

Wednesday, September 17, 2008

Recycled Denim Jacket

I made a denim jacket from three pair of blue jeans and one skirt using Butterick Pattern B0458, by Connie Crawford. I first mentioned the pattern here. As usual my pictures of the garment are not so great, but I'll keep trying!Recycled Denim Jacket B0458


And this close up turned out a little better.
Recycled Denim Jacket B0458

I also took many picture of how I laid out the pattern pieces on the denim if you are interested you can see them on Flickr

Here is a view of the pieces ready to go together.
B0458 layout

I chose the pieces by color, the facing pieces were a slightly lighter weight and that was a real bonus. All the denim was fairly lightweight, I wouldn't recommend diong this jacket with Levi's. The sleeves are cut with the out seam still sewn and there are darker pockets showing on the back of the side back pieces (I removed the pocket to make it fit). All the side pieces are from the skirt, the center front and back pieces are from one pair, and all the facings are from the last pair. Also my collar and cuffs are on the opposite grain.

I mostly followed the directions, I talk more about the construction here on Pattern Review.

A bonus to working with old jeans is the cost, if I make a mistake its not a big deal. And there are plenty out there. Choose Larger sizes if you are going to try something similar.

A drawback to recycling is that a lot of the denim is stretched in spots and may take more fussing, particularly the sleeves. And a caution, I have a couple of wear spots on my finished jacket, I should have looked things over a little better.

I LOVE my new jacket, I think it turned out awesome. I do have to decide what to use for buttons, but I have time. I'll definately be trying some more patterns. I need to do some drafting too. This is something that would be great for selling.

Saturday, August 9, 2008

My Itinerary and Supplies

I received my itinerary and list of supplies this week for the Baby Lock Passion for Fashion Challenge. So I'm really going to be in it! I'm very excited and can't believe I really have to wait until the end of September.

I made my hotel reservations today, Thursday till Sunday morning. Thursday night we have to be at the Rock Financial Showplace for our contest orientation, meeting our mentor Kayla Kennington and her assistant, Becky Fulgoni (last years second place winner), sewing space assignment, Baby Lock sewing machine orientation and meet and measure our model.

Friday is the first show day, we recieve our secret challenge in the morning and then have cash to shop for our supplies on the American Sewing Expo floor. We get a lunch at 12:30 and 7pm we have to stop sewing and leave the building.

Saturday is time to work on the garment again, then at 3pm we get to final fit our models. 6pm is the Fashion Show and judging.

Sunday is our free day to enjoy the Expo and maybe some classes.

Supplies....
muslin, threads, zippers, assortment of interfacings,basic sewing supplies, sewing chair, drafting tools (including one book), and asssortment of embroidery stabilizers.

I've got lots of sewing supplies so I can find most in my stash, I hope I don't bring anything illegal as basic sewing supplies, I'm really gonna have to think about that one to make sure I don't forget anything. My chair is embarrasing! The wheels are all clogged and flat and don't roll and it has a smashed up pillow seat. The embroidery stabilizers? Frankly that part scares me, I'm not really an embroidery person.

I'm dying to know what the secret challenge will be! I'm also interested to see who the other contestants will be. I'm sure to be surrounded by a lot of talent. No matter what this will definately be a fun experience.

Saturday, August 2, 2008

I'm a Contestant in The Baby Lock Passion for Fashion Sewing Challenge!

I'm so excited! I'm going to be a contestant at the 2nd annual Baby Lock Passion for Fashion Sewing Challenge at the American Sewing Expo in Novi, MI.

I entered my skirt, that started out here, because the rules called for something I had made in the last 2 yrs and I hadn't taken the time to make something new.
Reconstructed Bias Denim Skirt-Chevron
They are also going to keep my skirt for a display they are having. I'm guessing its the Reconstruction Zone where they will be doing a DIY on Jeans.

It is a 3 day event with an all day sewing session on Friday September 26th and the Fashion Show on Saturday at 5pm. I'm not worried about getting things finished on time, I'm just thinking about the creative side, part of the contest is to "make it your own". I'll be flipping thru my patternmaking books until then that's for sure!

I can't find any information about what the prizes are, but its sure to be a great experience!

Wish me luck!

Monday, July 28, 2008

Pattern Drafting

I've learned most of my Pattern Drafting from books. I did take a Fashion Design course that included Pattern Drafting in 1997 from Oakland County Adult Education and found it useful. In fact, that is how I was introduced to the book, Patternmaking for Fashion Design by Helen Joseph Armstrong. I'm sure there are other similar programs available.

I looked into a Fashion Design School, in Troy, MI, that advertises on the TV, but after going thru the process and not getting the answers I needed I decided not to go that route. I wasn't interested in a year of remedial math and english and I was hoping to place out of those courses based on my College education. I was told I could, but was given the run-around when it came to actually getting any information about a revised schedule. The tuition for the school would have equaled about 23,000, so it wasn't something I wanted to fool around about. I wanted definitive answers before I got completely involved and it wasn't given satisfactorily. A word of caution, read everything!!!! I was presented with a contract that I was told was non-binding, I read the entire thing, and I made them cross off, initial and make a copy for me, because there was a section that said I was responsible for the tuition EVEN IF I DECIDED NOT TO ATTEND. It could have been a problem, but because I read everything, and made the appropriate changes it wasn't.

After this experience, and an unwillingness to relocate, I decided, after the 23,000, a couple hundred on Pattern drafting books was nothing!

Pattern Drafting Books

I picked up several Pattern Drafting and Draping books, Pattern Drafting and Dressmaking by Dorothy Moore, Patternmaking for Fashion Design by Helen Joseph Armstrong, The Art of Fashion Draping by Connie Amaden-Crawford and a old 1950 Applied Pattern Designing by Herbert Mayer. My FAVORITE purchase by far is Patternmaking Made Easy by Connie Amaden-Crawford. I also picked up a couple related books The Complete Book of Fashion Illustration by Sharon Tate and Mona Edwards (even though I'll never be able to draw) and Grading Techniques for Modern Design by Jeanne Price and Bernard Zamkoff because I felt I would find them useful.

I get enjoyment from flipping thru the books and visualizing dart movement, I have found it useful when doing DIY projects, it has opened up my eyes as to what is possible. Darts on the neckline if it is accidently made too large and other possiblities I hadn't thought of before. I will definately purchase more Patternmaking Books in the future to learn more.

Sewing is really my skill, Pattern Drafting is time consuming for me. But it is really just a matter of pratice. I've been successful when I've put my mind to it and it is absolutely necessary when making garments to sell to the public.

Saturday, July 26, 2008

How to find work as a Seamstress

I find myself without any paid sewing work this week. This is not uncommon in July, but I usually just slow down, not stop completely. I have two people sending me work next week and I expect a large order from Florida in August, so it still moving, but it may be time to expand my clients again. This happens occasionally, people change their business or decide to stop doing what they are doing for whatever personal reasons. It is why it is important to have more than one contract, even if it is possible for one person to keep you busy full time (though not in my experience).

I have had referals from current customers, but mostly they want to keep me for themselves and don't give out my name. I have had a lot of referrals from people I no longer work for. Referals don't always work out. A lot of times it is just chit chat and the person who gets my name isn't really ready to start. Or they want to collaborate with me not hire me. Though I would consider a collaboration with the right person, I'm at a point in my life where I don't want to be a partner, I want to be a paid employee.

I started my search today on the internet. I put "seamstress michigan" into the search engine. I ended up filpping thru about 41 pages and getting a handful of places that I will send an email. I don't know how many will even respond, but its a start. You never know whose business has recently picked up or who has lost a seamstress.

I have also had luck in the past by going to an Art Fair or Show and inquiring in booths if they need any sewing help and/or dropping off a business card. The rejection rate is high, but if you are successful it can result in a long term relationship. The got the woman I work for in Virginia this way. She wasn't at the Show, but someone I talked to gave her my card. I've been working for her since 2001. She is one whose business is changing away from clothing and starting to focus more on accessories, because she has aquired several wholesale accounts over the last couple of years.

I also found a couple wesites that are worth checking regularly to see if they have a good fit for me:
Sewing Want Ads
Simply Hired
Fashion Jobs

You will have to try your own search in your area and see what comes up.

While working at a place insead of home isn't an option for me, it may be for you, especially if you are just starting out and need to inspire confidence. If I was in my 20's again, like I was when I was starting out, I'd even consider relocating, there are certainly a lot more opportunities in New York or California than in Michigan!

I went to a lot of interviews back then where they were not impressed with my youth or my experience (zip!). You may have to start out doing something that you don't like just to get the experience. I made a lot of swimsuits and little girls dance costumes, and I sure wasn't making much! I learned a lot though and it was all worthwhile.

I also have a website that needs updating, Production Seamstress, it does generate some interest.

Thursday, July 24, 2008

Needles for the Bernina 950

I recently received an email asking about which needles I use for the Bernina 950. Since it may be information others need, I decided to post the original email and my response here. Any knowledge anyone has to contribute about their experience with needles for the Bernina is welcome here!

Hi Diane,

I read your blog on Flickr. Can you help me with a question on needles for the 950. I have a 950 and have purchased the standard 287 WH needles by Bernina, but I decided to try the Cool Sew needles by CTS (they are supposed to allow higher speed without fraying the thread). They are cross referencing the 287 WH with a DBX257, 16X257, DBx1, 16X231, DBX1738, 1738, SY2270. I ordered some based on the chart and these needles end up being shorter than the 287 WH by what appears to be 1 mm. Have you used needles other than the 287 WH? If so, what size?

Thank you for your help!

Sincerely,

Name Withheld

Needles for a Bernina 950


Dear Name,


My Bernina needles have 287 WH on them, if I remember correctly, they are quite pricey. I have some Schmetz that say DBX1, 16X231, 287 WH and 1738 (A). The Schmetz's look to be a smidge shorter. I also have some superior Beka (made in germany)that say 16X257, 16X231,1738 and DBX1. I use the Beka's most with no ill effects, they look to be a smidge longer that the Berninas(I never held them next to each other before!). BUT, the schmetz's are a 12 the Bernina's are a 14 and the Beka's are a 16. Are the needles you are comparing all the same size? I have no idea if this is standard, just an observation.

I believe I got my Beka's at MJ Foley's, they are in MI like me and I can go pick up there, its been a while since I had to buy more, I'm not using the machine as often right now. You can also buy Organ 16X231 BALL POINT needles online.I used to sew in 8 to 10 hour stretches with the beka's so I'm sure they are good and will not damage the machine. I didn't use the Schmetz's as often because I did primarily sewing on felted wool. I don't remember any problems.....

I can also sew at max speed with the Bernina, my experience with any other thread besides gutermannn was to have the thread fray. I insist that my customers buy gutermann now. I didn't even think to blame the needles for the ,what I call, coring out (the thread got really thin and ended up as a snag/snarl at the needle eye).

You seem very on the ball (I never held the needles next to each other!), but I just wanted to add the the needle goes in off center. If you are having trouble with the thread shredding, check the manual to be sure you have it correctly off centered!.

Hope that helps!
Diane

Sunday, July 20, 2008

Tutorial: Christine Jonson Pattern #107 Tie Back Top

Tie Back Top #107, pattern envelope

I'm going to go thru the instructions that came with the pattern, for the Tie Back Top #107, one at a time with you. Most will be accompanied by a picture of what I did at that step, and I'll add any comments I have about what I did that may need explaining or add to the instructions. I will assume that you have the pattern instructions so I only have to add to them and not retype them here.

Here is where I started.

Tie Back Top #107, started here

Step 1: Basting, two rows.

Tie Back Top #107, step 1

Tie Back Top #107, step 1

Step 2: serged shoulder seams.

Tie Back Top #107, step 2

Steps 3 and 4: Sew ties, clip to the dot, serge finish seams. (I made a clip to let myself know where the dots were instead of tailors tacks.)

Tie Back Top #107, step 4

Tie Back Top #107, step 4

Tie Back Top #107, step 4

Tie Back Top #107, step 4

Step 5: I turned and presses, no pictures.

Step 6: This is the most difficult part, but don't worry, it is still not hard (Thank you, Christine!) just fussy! You have to make sure your sewing lines here meet the sewing lines you made when making the ties, that is key to having the front look neat and finished.

Match notches, adjust gathers to fit.
Tie Back Top #107, step 6

Tie Back Top #107, step 6

You must get the needle and stitches all the way to the previous sewing line.
Tie Back Top #107, step 6

Another pic, all the way to the previous sewing.
Tie Back Top #107, step 6

Check your work, looks good here!
Tie Back Top #107, step 6

I serge to clean it up after I finish the seam.
Tie Back Top #107, step 6

Step 7: Stitch betwen the dots, again it is important here to get the needle all the way to the previous stitching lines.

This is a picture of the drawing under step 8 (oops! before I serged it!).
Tie Back Top #107, step 7

Get in there!
Tie Back Top #107, step 7

Tie Back Top #107, step 7

Check your work. I single needled again and trimmed, instead of serging here.
Tie Back Top #107, step 7

Step 9 and 10: Side seams. How does your brain work? Christine's diagram is good. I put the top neatly on my dressform, mark what gets sewn together at the underarm seam, and go sit down and sew all 4 seams (right and left front and lining).

Tie Back Top #107, step 9

Tie Back Top #107, step 10

Step 11 and 12: Hem. Again how does your brain work? Christine's diagrams make sense to me, but when I'm sitting at the machine I do it a little differently. I straighten out the shirt, then reach between the layers at the underarm and pull the hem thru there (much like doing a lining on a jacket, but there are no sleeves). Sew around the hem and straighten it out back thru the arm. Sorry, no pic sewing the hem!

Tie Back Top #107, step 11

Step 13-15: Baste the armholes together, if you wish, sew sleeve underarm seams (my pictures didn't turn out, but pretty understandable!), and sew sleeve into armhole, matching notches. I sew with the sleeve on top, it helps me to manage the ease better.

Tie Back Top #107, step 15

Step 16: Double needle on the sleeve hem.

Tie Back Top #107, step 16

The finished product! My pictures don't do it justice, too cute!

Tie Back Top #107, front view

Tie Back Top #107, front view close

Tie Back Top #107, back view